The Google Assistant for Android developers – PART 2
This article follows a first article “The Google Assistant for Android developers - PART 1”.
In the first article, we have discovered the “Solutions” part offered by Google by going through the making of a simple app. We have built an App Action allowing us to directly launch a specific feature of our app with a vocal command, then we improved it with the displaying of a Slice.
Although really simple to build, we have quickly witnessed the limits of this part since it only allows us to launch a feature or, at best, display a few information of the app into the Assistant.
But when we think about the Google Assistant, we think “conversation”. In this second article, we will go through the second possibility for Android development with the “Custom Conversations” by building a Conversational Action that will allow us to exchange with the Assistant and get answers built with an API.
Conversational Actions
App Actions allow us to interact with the Google Assistant. But we can't really talk about conversations in the way that there is no real exchanges and there is no real start and end of the interaction. For instance, if I want to play a game or book a plane ticket, it will be difficult to get what I want with a single vocal command.
Conversational Actions are more advanced actions that will allow us to build interactions with a lot more precision. They are started when the user invokes them and continue until the end of the conversation is identified while taking into account the different factors of a real conversation as adapting to the interlocutor or dealing with the absence of answer to a question.
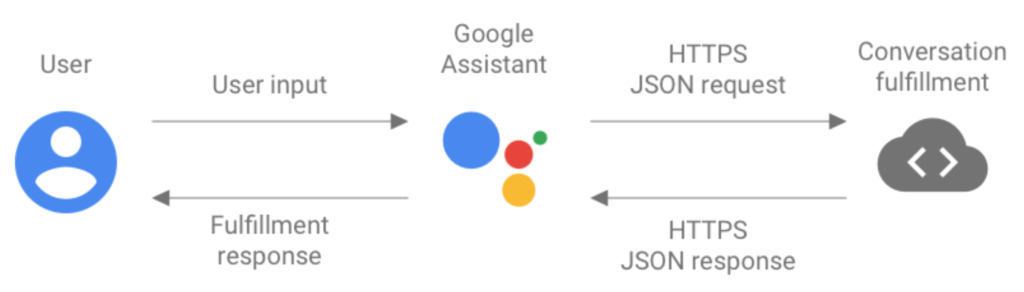
They work by exchanging JSON formatted data. When the user sends a vocal command to the Assistant, it triggers a series of steps in order to get adapted answer:
- the user input is transformed into text by the Assistant
- this text is used to build JSON requests
- these requests are sent to a “conversation fulfillment” by HTTPS request
- the conversation fulfillment parses the request into structured data, then triggers a webhook
- it returns the response of the webhook as JSON to the Assistant
- the Assistant processes this response to display an answer to the user
There are two ways of building conversational actions: the Actions SDK with which it will be necessary to provide our own Natural Language Understanding (NLU) solution, or Dialogflow, highly recommended by Google.
Here, we will only focus on the Dialogflow part and its web interface that will really ease our work.
Dialogflow ?
Dialogflow is an online service offered by Google and allowing us to build conversational interfaces by using machine learning. It is the most widely used tool to build Actions on more than 400 millions Google Assistants.
By using this service, we will let a Dialogflow agent handle the transformation of our requests with NLU, training phrases that we provide and the context of the conversation. Once a request is identified, it will associate it to an event and extract parameters into Dialogflow entities.
These events are associated to fulfillments, webhooks linked to Cloud Functions on Firebase into which we will be able to do all the logic needed by our request as calling a web service for instance.
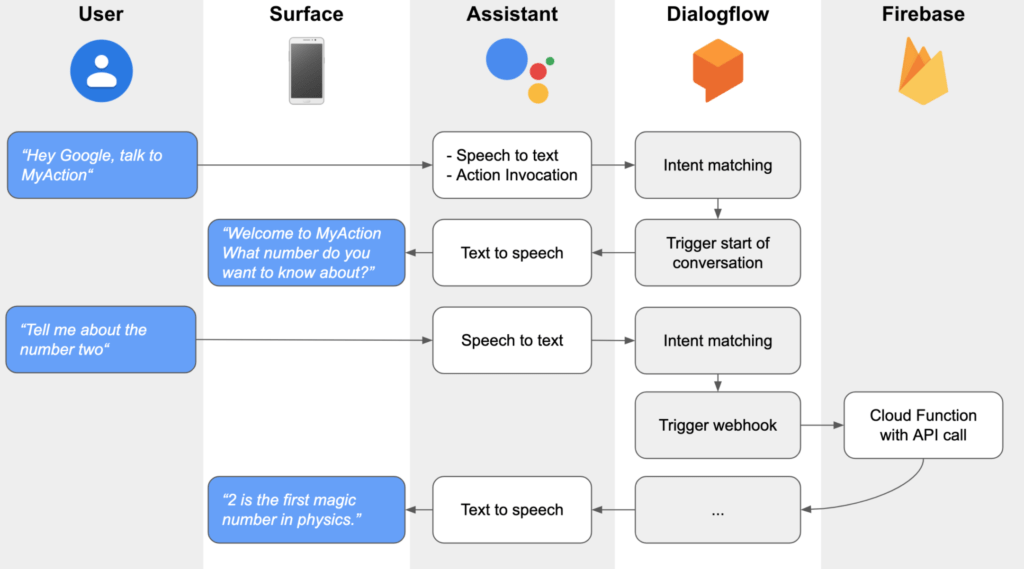
Let’s consider this case: the user wants to ask the Assistant for a fact about a number. He then must ask an adapted question from which an event will be associated by Dialogflow and an entity extracted as a number. From this event, a Cloud Function, taking this number as a parameter and making a call to an API to build an answer, will be triggered. Finally, this answer will be returned to the Assistant so that he just has to display and say it.
Thus, the major part of the work that we will have to do for setting up this Conversational Action will be building the Cloud Function.
Let’s do it!
Prerequisites
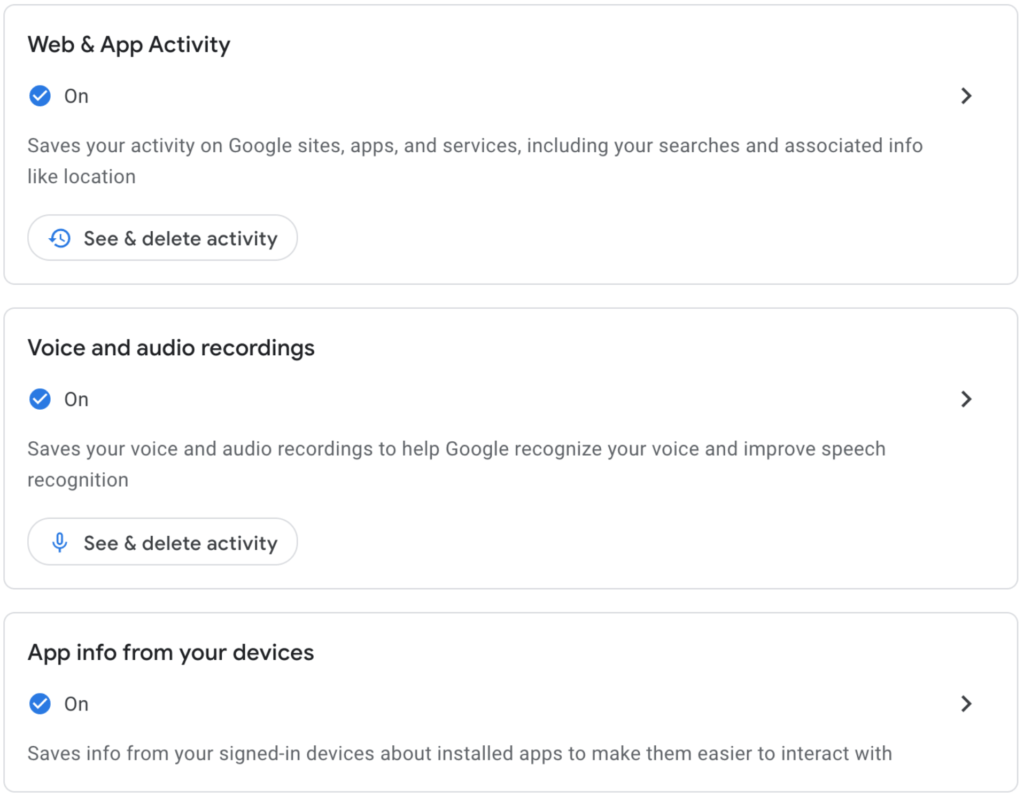
In order to start building a Conversational Action with Dialogflow, we have to activate some necessary parameters on our Google account:
- Web & App Activity
- Voice and audio recordings
- App info from your devices
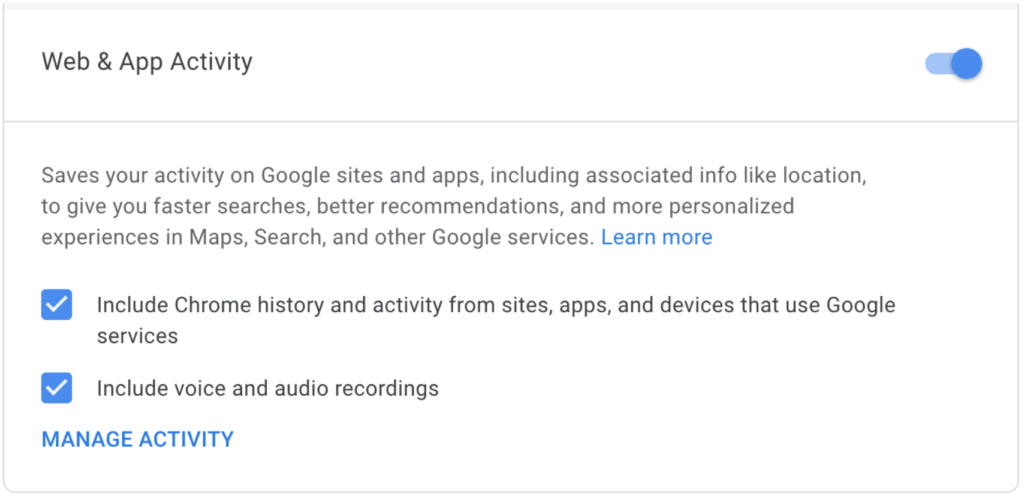
Then check “Include Chrome history” and “Include voice and audio recordings” into the “Web & App Activity” section.
Some basic knowledge of JavaScript is also recommended to understand the code of the Cloud Functions.
Finally, if we use Chrome with multiple associated accounts, it will be important to be logged with the same account on all the different consoles that we will be using next.
Building a Conversational Action with Dialogflow
The first step when building a Conversational Action is to go to the Actions Console. It is where we will be able to manage our actions, test them and at some point publish them.
Let’s create our project.
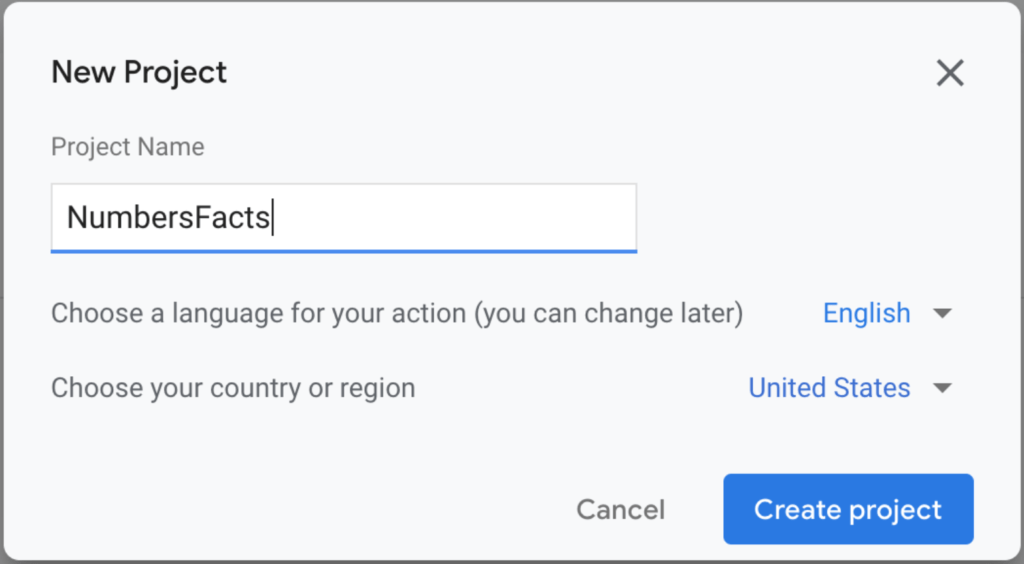
This will also create a project on Firebase on which to deploy the Cloud Functions to trigger from the webhooks that will be set.
Once the project is created, we can see that there is a lot of different experiences already provided by Google and available as Built-in Intents. But careful, although very similar, these Built-in Intents shown here are not those of the App Actions from the previous article. They are used to link specific events into Dialogflow and thus hold different sets of data.
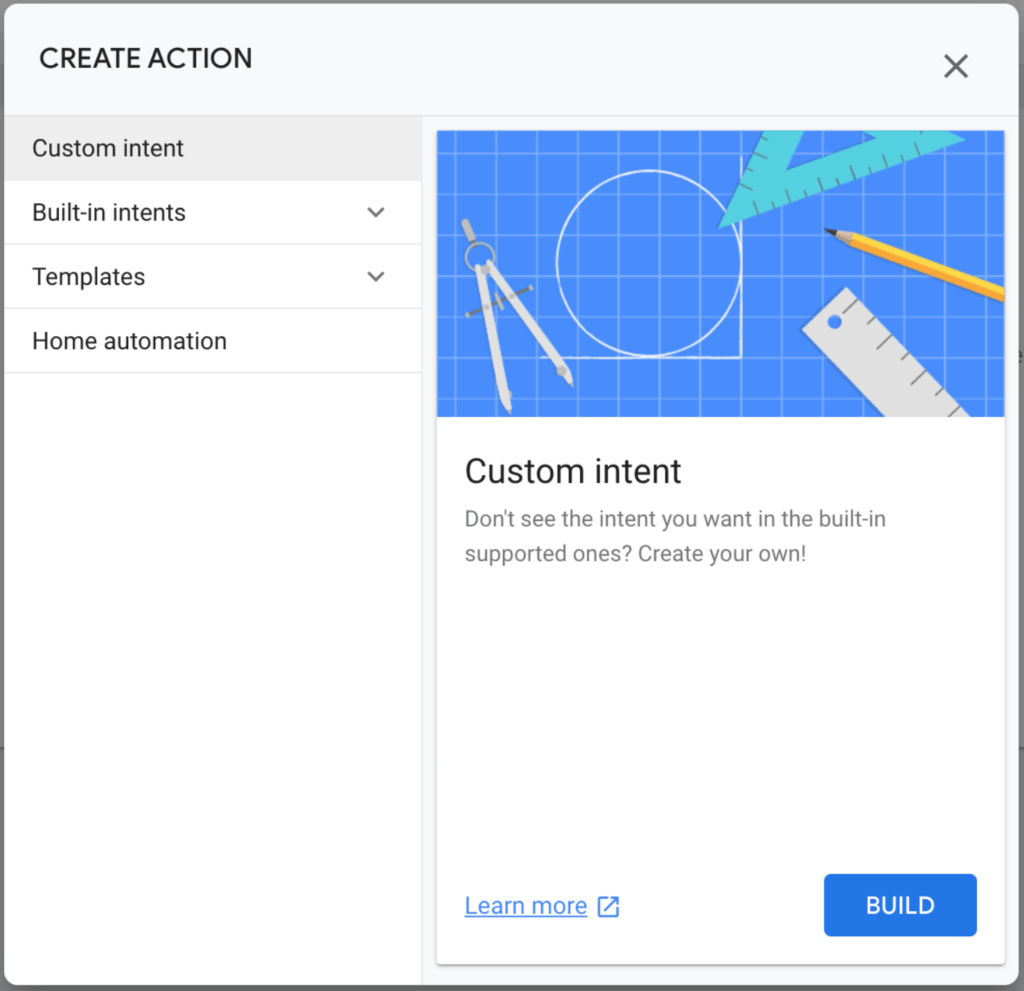
These Built-in Intents allow us to tell the Assistant that our Action can fulfill a specific category of user requests (play a game, get the horoscope…). But in order to better understand what we do, we will directly select the “Conversational” card to set up an empty action to be associated with a custom Dialogflow fulfillment.

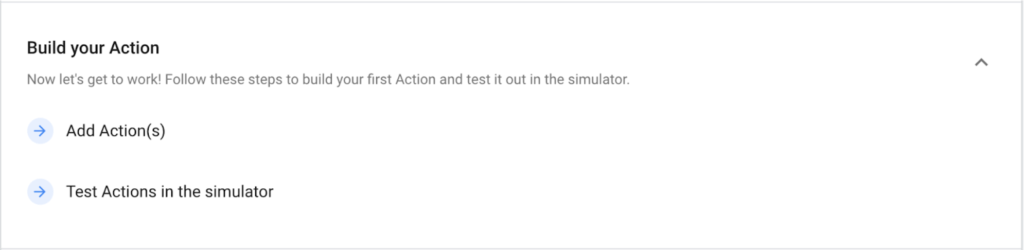
Our first project being created, let’s add our first Conversational Action by clicking Build your Action > Add Action(s) > Custom intent > Build.
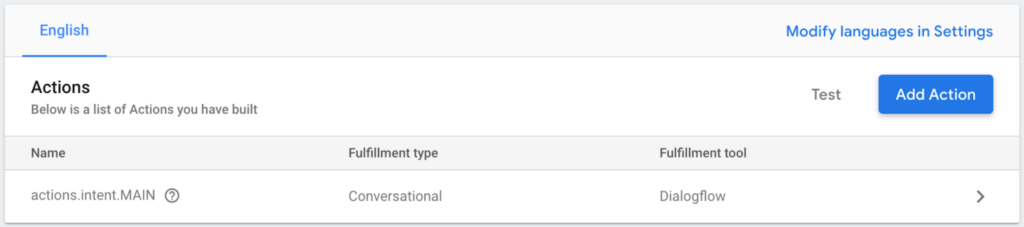
Creating this custom intent automatically redirect us to the Dialogflow console on the creation of the agent to be validated. We can then see that our agent is well linked to our project on the Actions Console.
Withing the Dialogflow console, there are the main sections that will interest us in this article:
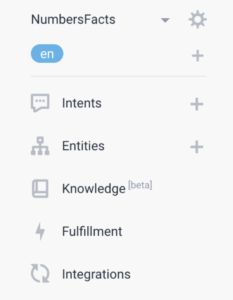
**Intents** | here we can found the different intents that we wil associate with our Action (start and end of a conversation, permissions asking, questions and processing of the answers…) |
**Entities** | here are the different entities that will be identified in our Action and used in our intents |
**Fulfillment** | there are the fulfillments of our intents as webhooks |
**Integrations** | it is here that we will be able to integrate our action to different services (Slack, Twitter etc.) but mainly configure the deployment of our modifications on the test console |
Start a conversation
In order to be able to start a conversation, every Actions project must have an entry point as a “welcome intent” that will be invoked when the user utters the name of the Action. This intent is created by default by Dialogflow in the Intents section. We can also see a fallback intent that will be used when Dialogflow can't match a specific intent with the received JSON request and that will tell the Assistant to answer something like “On more time?”.

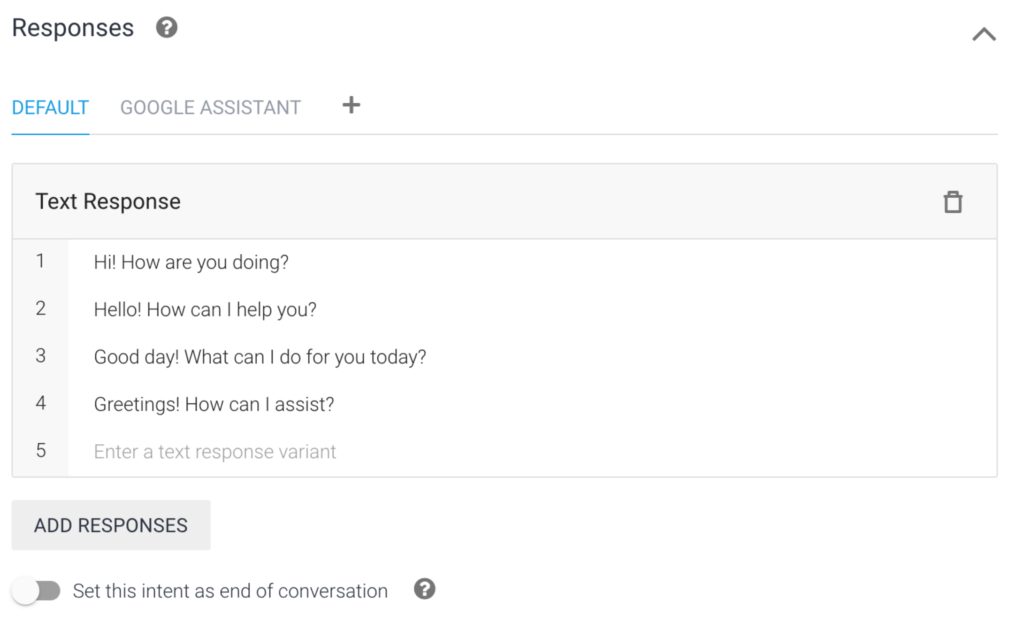
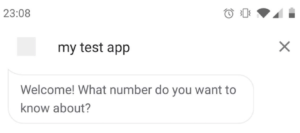
By clicking on our welcome intent, we can see the different responses by default. In order to have control on our Conversational Action from the start to the end of our conversation, let’s delete them all and add our own: “Welcome! What number do you want to know about?".
After every modification, whether it is on intents of fulfillments, never forget to save the modifications by clicking the SAVE button.
Testing a Conversational Action
We can now test our Action by going in the Integrations section and clicking on Google Assistant > Integration Settings > TEST. It is also useful to activate Auto-preview changes so that changes are automatically deployed to the Actions Console and the test simulator.
We are then redirected to the Assistant simulator on which we can test our Action. On the left side, there is a smartphone simulator and on the right side, a little more advanced version with the possibility to display our Action on various surfaces as Smart Displays or even speakers. These different surfaces will be useful to test specific cases like the absence of vocal input.
There are also some very useful tabs: REQUEST, RESPONSE, DEBUG and ERRORS. This is where we will be able to visualize the exchanged JSON requests and responses and access a first level of debugging of our interactions.
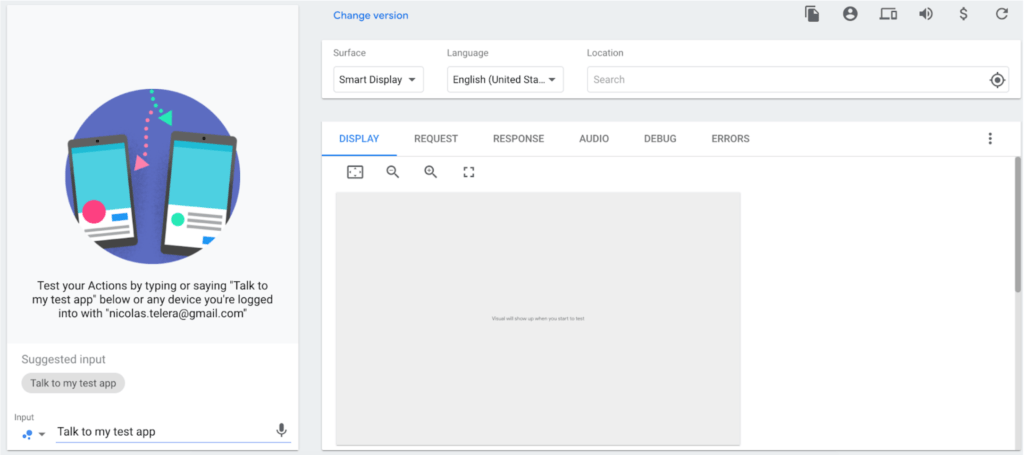
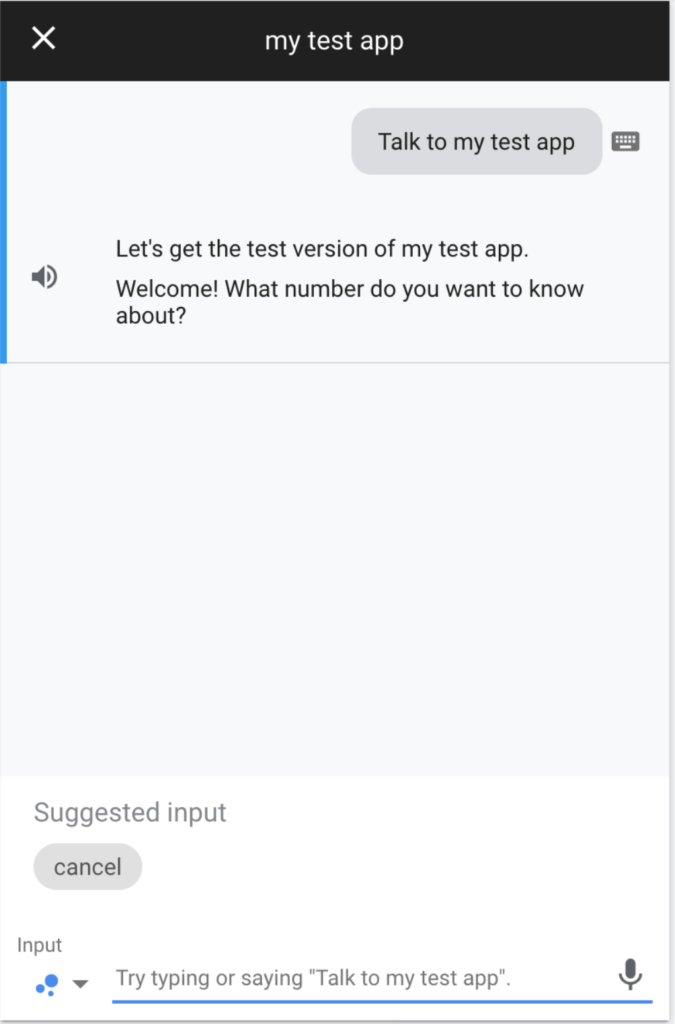
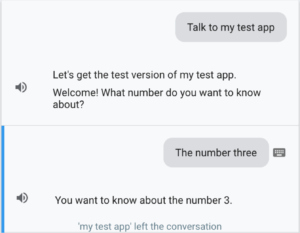
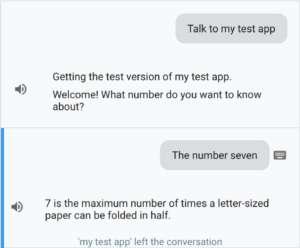
All we now have to do is type “Talk to my test app” and press enter or just click the suggested input in order to trigger our “Welcome intent”.
Note that once an Action is deployed, it is also possible to test it directly on a real device on which the Google account is authentified (you may need to configure its locale to English).
Now, do the same thing again. It doesn't work anymore? That is normal. We have just triggered a Conversational Action but we didn’t say that the conversation is over. Our Action is still running and is awaiting for the next input. That is why in order to run it again, we have to tell to the Assistant that we want to end it, for instance by sending “cancel”.
Adding a conversational response with a simple webhook
Now that our conversation start intent is ready, let’s add a new conversational response intent with a simple webhook based on an entity recognized by Dialogflow. Entities are categories of “things” that Dialogflow uses so that it can extract the value of parameters passed in the natural language requests.
The idea here is to create a new intent, train it with specific phrases based on a recognized entity (here, the numbers).
Let’s create a new intent “favorite number” (careful, a intent name is case-sensitive) and add the following training phrases to it:
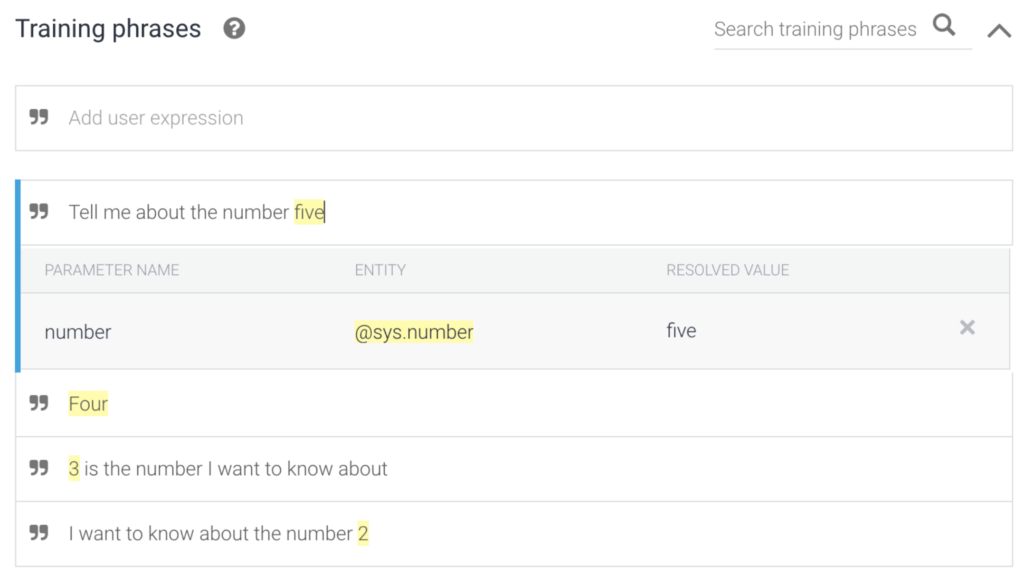
Dialogflow then automatically recognizes the @sys.number entity that it associates to a number parameter. Also, each time we save our changes, we can see that a machine learning model is trained with the new provided data.


Let’s then define the number parameter as required for this intent and add a question to it (“What number do you want to know about?”).
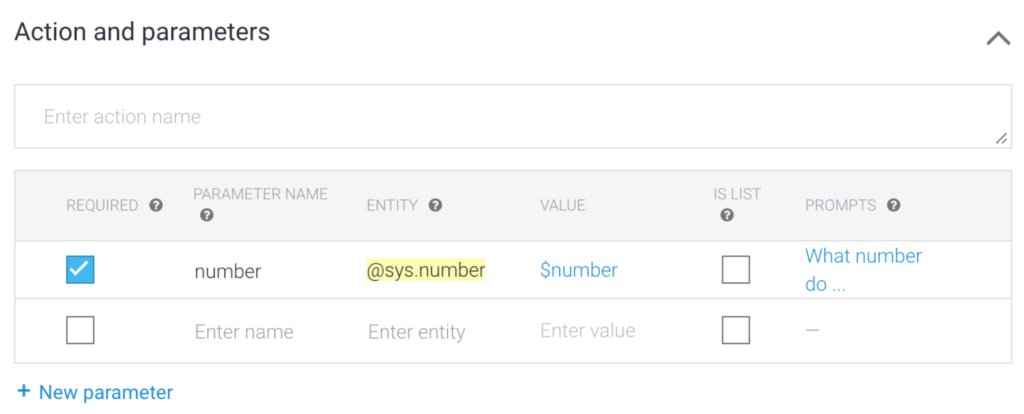
This prompt will be displayed to the user if the request does not contain this required parameter.
All we have to do left is configure the webhook.
To do so, we must first click on Enable webhook for this intent in the Fulfillment part of this intent (not to be confused with the Fulfillment section).
Then go to the Fulfillment section. We can see two options: Webhook, allowing us to link a webhook uploaded as a Cloud Function on Firebase, and Inline Editor, more simplistic and allowing to directly type some Node.js. We will start with this Inline Editor in which we will type the following code:
Here, we import the Dialogflow module for the Actions on Google, Firebase and the Dialogflow client then we handle the “number request” intent (which takes “number” as parameter) in order to display a simple response that ends the conversation.
The last step is to click DEPLOY (warning, this can take a few minutes).
Finally, our first simple conversational response is ready, let’s test it.
Adding a conversational response with a custom webhook
We have managed to build a response to our Action. However, it does not have much sense and we are quickly limited by the interface of the webhook editor on Dialogflow. We are then going to see how to deploy our own Cloud Functions in Node.js on Firebase so that we can make the most of our Action, which will also allow us to access the logs of our code.
Let’s install the Firebase Command Line Interface (Firebase CLI) on a terminal:
npm -g install firebase-tools
Then authenticate with our Google account:
firebase login
To make things easier, the project containing the code of the previous webhook, and that we are going to improve later, is available on Github.
We can now disable the Inline Editor in the Fulfillment section of Dialogflow then deploy our webhook manually by using the Firebase CLI. To do so, define the used project:
firebase use --project
The project ID can be found in the settings of the project on the Actions Console.

Install its dependencies from the functions folder:
npm install
And deploy the project:
firebase deploy --project
It is also possible that Firebase or npm have to be updated or that Firebase authentication token must be refreshed.

Now that our Cloud Function is deployed, we can see that its URL (visible in the Develop > Functions section on the Firebase console) is already set in the URL field of the Webhook part of the Fulfillment section in the Dialogflow console. Let’s just enable this webhook. If we go to the test simulator, we can still run our Action as if nothing happened!
In order to make our Action a little more useful, we are going to call an API in our Cloud Function by using the number parameter passed by the user. Let’s update the index.js file by replacing that line:
by this code:
And deploy the updated Cloud Function. Now, our Action responds a fact about the number that we asked for.
Keep the conversation going
For now, the conversation is started and we have an exchange between the user and the Assistant. However, the end of this conversation is a bit harsh. We would want to make it a little more lively by pursuing it and by defining a proper end.
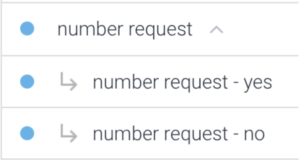
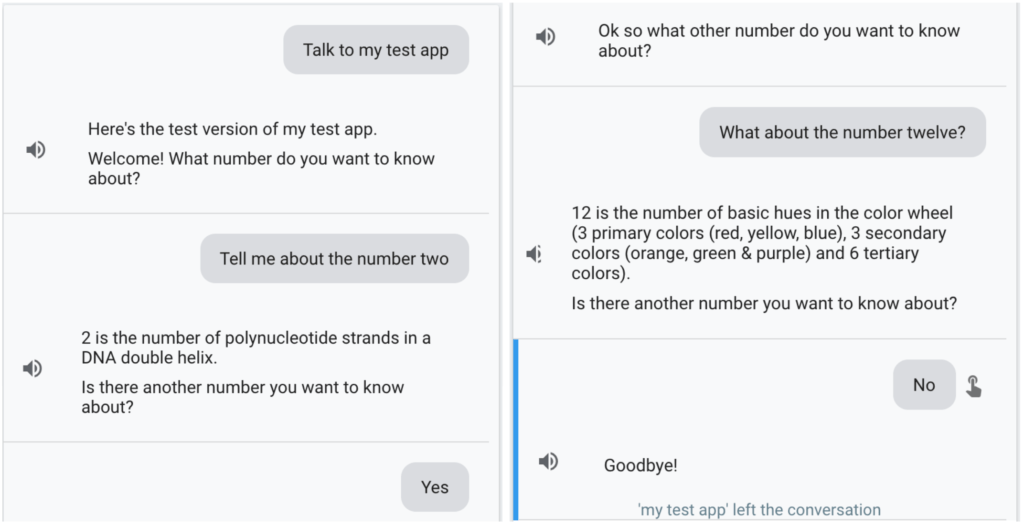
We are going to use the follow-up intents. Those are going to be linked to our custom intents in Dialogflow and will offer various follow-ups like “Yes”, “No”, “Repeat” etc. We are thus going to ask the user if he wants to ask for a new fact after that the Assistant gave him one.
First, let’s click on Add follow-up intent on our number request intent and add:
- a yes intent with a response “Ok so what other number do you want to know about?”, thus, when the user will answer with an input holding a word identified as associated with the @sys.number entity, our number request intent will be triggered again
- a no intent with a response “Goodbye!” and the “Set this intent as end of conversation” enabled so that this response is displayed before ending the conversation
Then, we have to update the code of the Cloud Function to ask the user if he wants a new fact. Let’s then add the Suggestions dependency at the beginning of the index.js file:
then update the conversation ending response:
by the displaying of that same response followed by a question with a Yes / No suggestion:
And deploy our Cloud Function to finally test it.
Adding a rich response
In order to finish our Conversational Actions basics tour, we are going to add a rich response to our Action. Rich responses allow us to display visual elements to enhance interactions with the Assistant. For instance, we can display images, carousels or even medias like a music player.
We need to add a couple of visual elements dependencies and replace the displaying of the answer by a card containing this same answer and an image.
Here’s our final code:
The deploy and test. To see the result of our update, we need to test the Action on the right side of the simulator and select an adapted surface (meaning a surface with a display like Smart Display of phone), or simply test it on an Android smartphone.
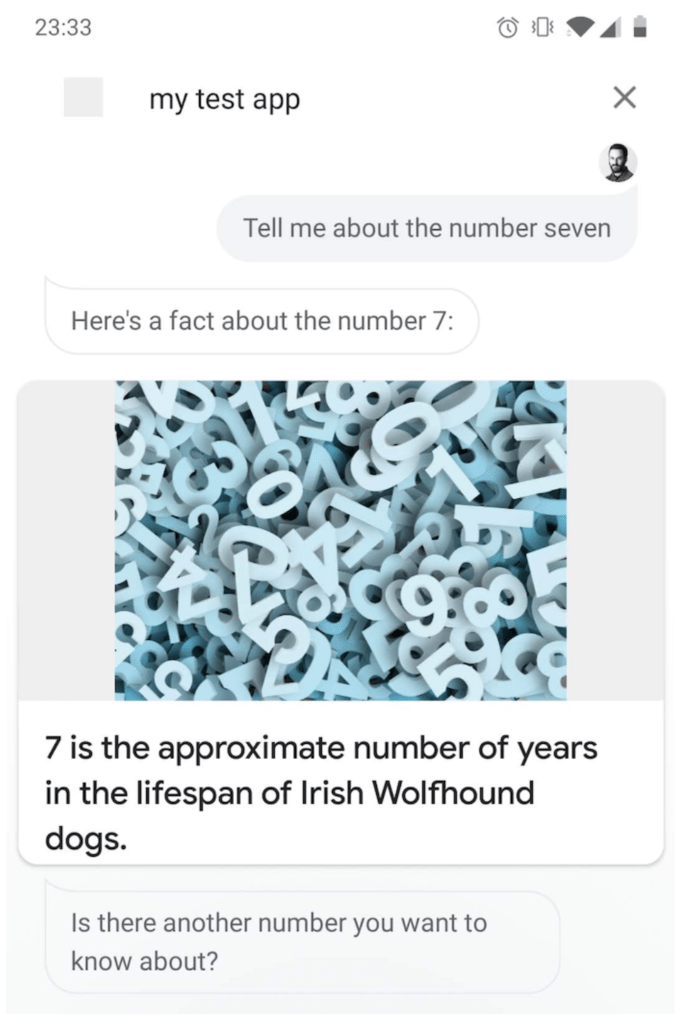
We now have a Conversational Action that covers the basics of a conversation with a start, exchanges with multiple choices of responses and a clear end, all with a visual response!
Conclusion
Where App Actions from the “Solutions” part only allowed us to extend the reach of our Android applications into the Assistant, Conversational Actions offer an impressive range of possibilities that we quicky want to “play” with for hours. Note that by using Dialogflow, we didn't even have to touch a bit of Android code! We would have just wished for a bit more clarity as for the required configurations on our Google Account (voice recordings, Chrome history…).
There are a lot more possibilities that exist and that we did not cover here so that we don’t overstep the goal of this article: discover the development of Actions on the Google Assistant. Among these possibilities, we can think of handling sounds, silences on speakers, unexpected inputs, data storage or different types of invocation (explicit or implicit).
We are quite used to launch our favorite apps through the Assistant but few are the real interactions that go beyond the simple launching of a feature. As I mentioned I the introduction of the first article, Actions development still seems quite mysterious for Android developers. That is why I hope that these articles will have succeeded in demystifying it a little and that you will be excited to try it yourself!
If you liked this second article, I invite you to go and check the Conversational Actions official documentation and the brilliant codelabs that can be found there, including an example of a Hangman game using a pretty advanced display.
Goodbye!
'Nicolas Telera' left the conversation