TDD with Vue.js
Introduction:
We've all heard of Vue.js, the last trendy JavaScript framework. Some have already played with it. But beyond the POC, it's time to gear up for real life Vue.js projects. And what's better than some TDD with Vue.js to achieve that? The point of this article is to share the basics to develop with Vue.js using TDD. To do so, we will use a very simple component based on Vue CLI default template. We will add to it a few WebFront basic features: two buttons to increment or add a random value (from 1 to 6) to a counter.
You can find more information about Vue.js on its well designed documentation: https://vuejs.org/v2/guide/. Consume without moderation.
Git repository:
If you get lost, every commit related to each step of this article can be found here:
https://github.com/trollepierre/my_project_vue/commits/master
Bootstrap:
Like most front end frameworks, Vue.js come with a good CLI (Command Line Interface). It has most tools we'll need et we'll follow each step of its process:
To install it:
npm install --global vue-cli
To create a new project, we will use webpack:
vue init webpack name_of_my_project
This command comes with several options. We advise to keep the default ones:
- runtime build and compiler
- vue-router
- eslint
- standard configuration (the AirBnb configuration is not advised to beginners)
- Karma + Mocha, for tests
- However, e2e tests (end-to-end) will not be covered by this article.
Here you go, your new project is ready to be started:
cd name_of_my_project
npm install
npm run dev
That's it, the environment is ready and a web page is waiting for you on http://localhost:8080:
Related commit: https://github.com/trollepierre/my_project_vue/commit/dd5d7c4
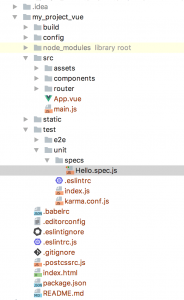
And here is the folders tree generated by the CLI:
A test is already written. It's a template test which is not very atomic. Indeed, it is asserting that after the view is built, the $el element, which defines the HTML, does contain a h1 tag with a text defined by a {{ msg }} variable.
Hello.spec.js
import Vue from 'vue' import Hello from '@/components/Hello'
describe('Hello.vue', () => { it('should render correct contents', () => { const Constructor = Vue.extend(Hello) const vm = new Constructor().$mount() expect(vm.$el.querySelector('.hello h1').textContent) .to.equal('Welcome to Your Vue.js App') }) })
0) Work environment
Whatever IDE you use, you should install the Vue.js plugins. They are functional and provide useful development helpers. For this article, I chose IntelliJ with the Vue.js plugin.
Foreword
To simplify the writing of the tests, I advise to make the vm variable (for Vue mounted: vm is the Vue instance after construction and with a loaded template, refer to the lifecycle diagram) a global one and to define a beforeEach method preceding all assertions. We can thus access the "Vue mounted" vm built for each assertion.
Hello.spec.js
let vm
beforeEach(function () { const Constructor = Vue.extend(Hello) vm = new Constructor().$mount() })
1) Testing data
First, we will take an atomic approach and unit test the msg variable value. To do so, we will use the vm.$data.variable_name accessor.
Hello.spec.js
it('should check that msg is Welcome to Your Vue.js App', () => { expect(vm.$data.msg).to.equal('Welcome to Your Vue.js App') })
This test directly checks the variable value. This allows to only have one test to update should the initial value change.
Hello.spec.js
it('should render my msg inside a h1', () => { expect(vm.$el.querySelector('.hello h1').textContent) .to.equal(vm.$data.msg) })
Another solution is to directly provide the variable to the test constructor.
Hello.spec.js
it('should render correct contents', () => { const data = { data: { msg: 'plop' } } const Constructor = Vue.extend(Hello) vm = new Constructor(data).$mount() expect(vm.$el.querySelector('.hello h1').textContent) .to.equal('plop') })
Related commit: https://github.com/trollepierre/my_project_vue/commit/bb5fa77
We can now easily add new variables, such as a counter whose initial value should default to 0:
Hello.spec.js
it('should create a counter with zero value', () => { expect(vm.$data.counter).to.equal(0) })
To make this test go green, we can simply add a counter to our data:
Hello.vue
data () { return { msg: 'Welcome to Your Vue.js App', counter: 0 } }
Related commit: https://github.com/trollepierre/my_project_vue/commit/6d46beb
We want to add this counter to the template:
⇒ The related test will have to check that the counter value does match the content of a div with a counter class
Hello.spec.js
it('should render counter with counter data value', () => { // Given const data = { data: { counter: 48 } } const Constructor = Vue.extend(Hello)
// When vm = new Constructor(data).$mount()
// Then expect(vm.$el.querySelector('.hello div.counter').textContent) .to.equal('48') })
⇒ We run the tests and check that they are red for the right reason.
⇒ We write the simplest code to make it green.
Hello.vue
<div class="counter">{{ counter }}</div>
⇒ We run the tests again, and they go green!
⇒ Let's see if we can do some refactoring
⇒ We can move to the next assertion
Related commit https://github.com/trollepierre/my_project_vue/commit/a7b267a
2) Test the name
To test our Vue name, we can use the $options accessor.
$options returns all options necessary to the instantiation of the vue, such as its name, its methods, its directives or its components.
Hello.spec.js
it('should check the name of my vue', () => { expect(vm.$options.name).to.equal('hello') })
Related commit: https://github.com/trollepierre/my_project_vue/commit/6c80506
3) Create a component
- a) Add a test on the name
We now want to add a component: a special button which the user has to click: ClickMeButton. We first create the matching test class: ClickMeButton.spec.js (similarly to Hello.spec.js) and we test the name:
ClickMeButton.spec.js
import Vue from 'vue' import ClickMeButton from '@/components/ClickMeButton'
describe('ClickMeButton.vue', () => { let vm
beforeEach(function () { const Constructor = Vue.extend(ClickMeButton) vm = new Constructor().$mount() })
it('should check the name of my vue', () => { expect(vm.$options.name).to.equal('clickMeButton') }) })
We can now create the component:
ClickMeButton.vue
<template> <div class="clickMeButton"></div> </template>
<script> export default { name: 'clickMeButton' } </script>
Related commit: https://github.com/trollepierre/my_project_vue/commit/c774799
- b) Add a test on the template elements
We want to add a button in the template:
ClickMeButton.spec.js
it('should render button with text Click Me Button', () => { expect(vm.$el.querySelector('.clickMeButton button').textContent) .to.equal('Click Me Button') })
The code to write in the ClickMeButton.vue is very simple:
ClickMeButton.vue
<template> <div class="clickMeButton"> <button>Click Me Button</button> </div> </template>
<script> export default { name: 'clickMeButton' } </script>
Related commit: https://github.com/trollepierre/my_project_vue/commit/94c6a11
- c) Add a test on the components props
Each Vue.js component has its own scope. This means you can't access the data of a parent component from its subcomponents. That's why the parent components call their subcomponents passing them 'props' (short for 'properties').
We want to choose the text displayed by the button for each use of the ClickMeButton component. To do that, we use a props:
In the test, we update the beforeEach so that a propsData is passed on for each component creation.
ClickMeButton.spec.js
beforeEach(function () { const config = { propsData: { message: 'Click Me Button' } } const Constructor = Vue.extend(ClickMeButton) vm = new Constructor(config).$mount() })
Thus, we can update the ClickMeButton.vue file and remove the hardcoded string 'Click Me Button'
ClickMeButton.vue
<template> <div class="clickMeButton"> <button>{{ message }}</button> </div> </template>
<script> export default { name: 'clickMeButton', props: ['message'] } </script>
Related commit:https://github.com/trollepierre/my_project_vue/commit/c1731f7
4) Test for the presence of a subcomponent
Firstly, we import the ClickMeButton into the spec class:
Hello.spec.js
import ClickMeButton from '@/components/ClickMeButton'
Then we assert that it is present after the class instantiation:
Hello.spec.js
it('should include a clickMeButton', () => { const clickMeButton = vm.$options.components.ClickMeButton expect(clickMeButton).to.contain(ClickMeButton) })
We can update the code by importing the component into the script section, and by adding the component name to the components to export to the template. Finally, we add the component name using kebab-case into the template (Vue will change the names of the components from PascalCase to kebab-case).
Hello.vue
<template> <div class="hello"> <click-me-button></click-me-button> </div> </template>
<script> import ClickMeButton from '../components/ClickMeButton' export default { name: 'hello', components: { ClickMeButton } } </script>
Related commit: https://github.com/trollepierre/my_project_vue/commit/2789185
5) Test the props passed to a component
We want to change the message returned by the ClickMeButton. To do that, Hello.vue must define the message property anytime the ClickMeButton is used. This is done using props. Here is how to assert that the ClickMeButton was called with the proper prop message:
Hello.spec.js
it('should define a message to put inside the clickMeButton', () => { expect(vm.$options.components.ClickMeButton.props).to.haveOwnProperty('message') })
To have this test go green, the propsData message must be added to the click-me-button tag in the template.
Hello.vue
<click-me-button message="Increment counter"></click-me-button>
And to assert the content of the button text, passed on through the message variable:
Hello.spec.js
it('should verify textContent of the Click Me Button', () => { expect(vm.$el.querySelector('.clickMeButton button').textContent) .to.equal('Increment counter') })
Related commit: https://github.com/trollepierre/my_project_vue/commit/1c20a6f
6) Test a method
It's very easy to access the methods and test them. You can directly call the method on the vm object we defined in the tests.
Hello.spec.js
describe('incrementCounter', function () { it('should increment the counter to 1', () => { // When vm.incrementCounter()
_// Then_
expect(vm.$data.counter).to._equal_(1)
}) })
We can now create the method:
Hello.vue
methods: { incrementCounter: function () { this.counter += 1 } }
Related commit: https://github.com/trollepierre/my_project_vue/commit/4f2136d
Testing methods is fairly easy, and that's good because that's what we'll want to do most!
We also want to add a new onButtonClick method to the ClickMeButton component, so that a 'buttonHasBeenClicked' event is emitted. The test is simple: we call the new method from the vue once it's mounted: vm.onButtonClick()
The test is just a spy with Sinon.js
ClickMeButton.spec.js
describe('onButtonClick', function () { it('should emit click ', () => { // Given sinon.spy(vm, '$emit')
_// When_
vm.onButtonClick()

_// Then_
expect(vm.$emit).to.have.been.calledWith('buttonHasBeenClicked')
}) })
We can now implement the method:
ClickMeButton.vue
<script> export default { name: 'clickMeButton', props: ['message'], methods: { onButtonClick: function () { this.$emit('buttonHasBeenClicked') } } } </script>
Related commit: https://github.com/trollepierre/my_project_vue/commit/31ed02d
7) Bind the method to the template
The method is tested but it hasn't been added to the website yet. To do that, we will add it to the template and link it to a button.
We want to check that the method was called.
ClickMeButton.spec.js
it('should emit an event when button is clicked', () => { // given sinon.spy(vm, '$emit') const button = vm.$el.querySelector('button') // when button.click() // then expect(vm.$emit).to.have.been.calledWith('buttonHasBeenClicked') })
We can now add the related piece of code:
ClickMeButton.vue
<template> <div class="clickMeButton"> <button v-on:click="onButtonClick">{{ message }}</button> </div> </template>
Related commit: https://github.com/trollepierre/my_project_vue/commit/a12fa30
8) Test the event transmission from a subcomponent to its parent
The point is now to increment a counter each time the button is clicked. One way to do it is to trigger the 'incrementCounter' method anytime the ClickMeButton component emits the 'buttonHasBeenClicked' event.
As this article was written I hadn't found out how to stub an event emitted by a subcomponent. The workaround is to use an integration test, simulating the click on the previously created button, and checking that the counter variable was properly incremented.
Hello.spec.js
it('should increment counter when button from ClickMeButton is clicked', () => { // given let button = vm.$el.querySelector('.clickMeButton button')
// when button.click()
// then expect(vm.$data.counter).to.equal(1) })
And the related code, asserted by the test:
Hello.vue
<click-me-button message="Increment counter"
v-on:buttonHasBeenClicked="incrementCounter"></click-me-button>
Related commit: https://github.com/trollepierre/my_project_vue/commit/a3c89ac
We can now display the result with the command:
npm run dev
The result:
9) Call an external API: the use of http Vue-resource
To call an external API, we will need vue-resource:
npm install vue-resource - - save
To use VueResource in each Vue object of the production code, we insert it into the src/main.js file, as well as in the Hello.spec.js file.
src/main.js et Hello.spec.js
import VueResource from 'vue-resource' Vue.use(VueResource)
To write the next tests, we will need stubs and promises. That's why we'll use sinon-stub-promise and its karma integration karma-sinon-stub-promise
npm install sinon-stub-promise - - save-dev
npm install karma-sinon-stub-promise - - save-dev
Add sinon-stub-promise to the karma configuration file:
test/unit/karma.conf.js
frameworks: ['mocha', 'sinon-stub-promise','sinon-chai', 'phantomjs-shim']
The rollthedice API returns for every call the result of a die roll. We will use this URL: http://setgetgo.com/rollthedice/get.php
It is time to write the next test. First, we need to stub the call to a URL (Vue.http.get) thanks to a Sinon.js promise. It is necessary to define this stub before the object is constructed. Then we can construct the "Vue mounted"and define the call to the method that we'll name incrementFromTheDice.
The assertion checks the URL called by the API.
After the test, don't forget to restore the state with the Vue.http.get.restore method. Otherwise some conflict might appear with the other promise tests, and that would be very bad!
Hello.spec.js
describe('incrementFromTheDice()', () => { it('should call api to get the dice number', () => { // given sinon.stub(Vue.http, 'get').returnsPromise()
_// construct vue_
const Constructor = Vue._extend_(Hello)
const vm = new Constructor().$mount()

_// when_
vm.incrementFromTheDice()

_// then_
expect(Vue.http.get).to.have.been.calledWith('http://setgetgo.com/rollthedice/get.php')

_// after_
Vue.http.get.restore()
}) })
The related production code:
Hello.vue
incrementFromTheDice: function () { this.$http.get('http://setgetgo.com/rollthedice/get.php') }
Related commit: https://github.com/trollepierre/my_project_vue/commit/08b4bcd
We can add the die roll result to the variable displayed by the counter by returning a result via the promise:
Hello.spec.js
it('should call increment counter from API answer', () => { // given const promiseCall = sinon.stub(Vue.http, 'get').returnsPromise() promiseCall.resolves({ body: '5' })
// construct vue const Constructor = Vue.extend(Hello) const vm = new Constructor({ data: { counter: 6 } }).$mount()
// when vm.incrementFromTheDice()
// then expect(vm.$data.counter).to.equal(11)
// after Vue.http.get.restore() })
The parseInt() function is necessary to convert to an integer the string returned by the API. Then we add the retrieved value to the counter:
Hello.vue
incrementFromTheDice: function () { this.$http.get('http://setgetgo.com/rollthedice/get.php') .then((response) => { this.counter += parseInt(response.body, 10) }) }
Related commit: https://github.com/trollepierre/my_project_vue/commit/dac8dd2
We also need to test the case when the API returns and error. In that case, we want to reset the counter to 0.
Hello.spec.js
it('should reinit counter when api rejects error', () => { // given const promiseCall = sinon.stub(Vue.http, 'get').returnsPromise() promiseCall.rejects()
// construct vue const Constructor = Vue.extend(Hello) const vm = new Constructor({ data: { counter: 6 } }).$mount()
// when vm.incrementFromTheDice()
// then expect(vm.$data.counter).to.equal(0)
// after Vue.http.get.restore() })
The production code becomes:
Hello.vue
incrementFromTheDice: function () { this.$http.get('http://setgetgo.com/rollthedice/get.php') .then((response) => { this.counter += parseInt(response.body) }, () => { console.log('La Base semble être KO !') this.counter = 0 }) }
Related commit: https://github.com/trollepierre/my_project_vue/commit/fd38826
Finally, to visualise the results, all is left to do is adding the button to the page:
Hello.spec.js
it('should incrementFromTheDice when button roll-the-dice is clicked', () => { // given let button = vm.$el.querySelector('button.roll-the-dice') const promiseCall = sinon.stub(Vue.http, 'get').returnsPromise() promiseCall.resolves({ body: '5' })
// when button.click()
// then expect(vm.$data.counter).to.equal(5)
// after Vue.http.get.restore() })
And we add the button to cast the die:
Hello.vue
<button class="roll-the-dice" v-on:click="incrementFromTheDice">ROLL THE DIE</button>
Related commit: https://github.com/trollepierre/my_project_vue/commit/b5912ad
Conclusion
And here's a page rather simple to realise! It contains 2 buttons to increment or add a die roll to a counter, which is obviously very trivial. But the point of this article is to write a code that thoroughly follows the TDD principles, and that's properly covered by a fine grain test harness.
In this article, we took time to detail the main types of unit tests that the Vue.js framework lets us do. We wanted to emphasise that TDD is a valid option with Vue.js, and the that these tests are within anybody's reach.
In a following article, we may detail how to test the created() method on the Vue creation and the directives.