How does it work? Docker! Part 5: Get some work(ers) done!
Hey there!
TL;DR
I hacked another thing together, this time in order to install a highly available Docker Swarm cluster on CoreOS (yeah, Container Linux), using Ansible.
The whole subject was way too long for a single article. Therefore, I’ve divided it into 5 parts. This is episode 5, regarding the actual implementation of the local cluster’s Worker nodes, using Vagrant, CoreOS and Ansible.
If you want to try it:
git clone https://github.com/sebiwi/docker-coreos.git
cd docker-coreos
make up
You will need Ansible 2.2+, Docker, Vagrant and Molecule
Where are my Workers man?
Right, workers.
Same procedure as before: main, configure and test.
In order to configure the Worker node, we will first check if Swarm mode is already activated, like we did on the previous roles. If it is, we won’t do squat. If it isn’t, we will go fetch the token needed to join the cluster as a Worker node from the Leader node, and then join the cluster as a Worker node. You should know that the token used in order to join the cluster as a Worker node is different from the one user to join it as a non-Leader Manager node. So:
---


- name: Check if Swarm Mode is already activated

  command: docker info

  register: docker_info

  changed_when: false


- name: Recover Swarm Leader token

  shell: docker swarm join-token worker | grep token | cut -d ' ' -f 6

  register: worker_token

  when: "'Swarm: active' not in docker_info.stdout"

  delegate_to: "{{ groups['swarm-leader'][0] }}"


- name: Join Swarm Cluster as Worker

  command: docker swarm join --token {{ worker_token.stdout }} {{ hostvars[groups['swarm-leader'][0]]['ansible_env']['COREOS_PUBLIC_IPV4'] }}

  when: "'Swarm: active' not in docker_info.stdout"
Once again, the delegate_to flag is needed in order to actually recover the token from the Leader node itself. Then, for the test part:
---


- name: Check if node is Worker

  shell: docker node ls | grep {{ ansible_hostname }}

  register: docker_info

  changed_when: false

  delegate_to: "{{ groups['swarm-leader'][0] }}"


- name: Fail if node is not Worker

  assert:

    that:

      - "'Reachable' not in docker_info.stdout"

      - "'Leader' not in docker_info.stdout"

      - "'Active' in docker_info.stdout"
This is quite similar to the previous test, in the way that first, information is collected form the Leader node. Then, the assertions are slightly different: we will test that the node is not a Leader nor a non-Leader manager node, therefore asserting that it is a Worker node, and then we will test if the node is Active, since we want our Worker to work, by running containers. That’s why they’re Workers, right?
Once we’re done with that, we’ll just add our newly created role to the swam.yml file:
- name: Create Swarm Worker nodes

  hosts: swarm-worker

  roles:

    - role: configure/swarm-worker

      tags: [ swarm-worker ]
Nothing special right here, just use the previously defined swarm-worker group and you’re all set.
Did it work then?
Sure it did. We tested manually. Oh right, we also did that molecule thingy at the beginning, didn’t we? Now, testing is something that should be done at every step of the way, but I’ll just show you now that everything we coded works, is idempotent and it’s syntax is valid.
Use the test target from the Makefile:
make test
This will launch the whole molecule testing pipeline, first checking if the virtual machines are already created, and checking the validity of the playbook’s syntax as well:
 $ ansible  sebiwi  ~  stuff  docker-coreos   master  molecule test

--> Destroying instances...

--> Checking playbook's syntax…
If it is, it will then proceed to create the instances:
playbook: swarm.yml

--> Creating instances...

Bringing machine 'swarm-manager-01' up with 'virtualbox' provider...

Bringing machine 'swarm-manager-02' up with 'virtualbox' provider...

Bringing machine 'swarm-manager-03' up with 'virtualbox' provider...

Bringing machine 'swarm-worker-01' up with 'virtualbox' provider...

Bringing machine 'swarm-worker-02' up with 'virtualbox' provider...

Bringing machine 'swarm-worker-03' up with 'virtualbox' provider...
Once they are up, the playbook itself will be launched on the newly created infrastructure:
--> Starting Ansible Run...


PLAY [Bootstrap coreos hosts] **************************************************


TASK [bootstrap/ansible-bootstrap : Check if Python is installed] **************

fatal: [swarm-manager-01]: FAILED! => {"changed": false, "failed": true, "rc": 127, "stderr": "Warning: Permanently added '[127.0.0.1]:2222' (ECDSA) to the list of known hosts.\r\nShared connection to 127.0.0.1 closed.\r\n", "stdout": "/bin/sh: /home/core/bin/python: No such file or directory\r\n", "stdout_lines": ["/bin/sh: /home/core/bin/python: No such file or directory"]}

...ignoring
If everything works fine, another idempotence test will be executed, which will just verify if there are any changes when the playbook is ran using the --dry-run option:
PLAY RECAP *********************************************************************

swarm-manager-01           : ok=15   changed=5    unreachable=0    failed=0

swarm-manager-02           : ok=16   changed=6    unreachable=0    failed=0

swarm-manager-03           : ok=16   changed=6    unreachable=0    failed=0

swarm-worker-01            : ok=16   changed=6    unreachable=0    failed=0

swarm-worker-02            : ok=16   changed=6    unreachable=0    failed=0

swarm-worker-03            : ok=16   changed=6    unreachable=0    failed=0


--> Idempotence test in progress (can take a few minutes)...

--> Starting Ansible Run...

Idempotence test passed.
Finally, ansible-lint is executed in order to verify the playbook style and usage of deprecated tasks/options, and then the infrastructure is destroyed:
--> Executing ansible-lint...

--> Destroying instances...

==> swarm-worker-03: Forcing shutdown of VM...

==> swarm-worker-03: Destroying VM and associated drives...

==> swarm-worker-02: Forcing shutdown of VM...

==> swarm-worker-02: Destroying VM and associated drives...

==> swarm-worker-01: Forcing shutdown of VM...

==> swarm-worker-01: Destroying VM and associated drives...

==> swarm-manager-03: Forcing shutdown of VM...

==> swarm-manager-03: Destroying VM and associated drives...

==> swarm-manager-02: Forcing shutdown of VM...

==> swarm-manager-02: Destroying VM and associated drives...

==> swarm-manager-01: Forcing shutdown of VM...

==> swarm-manager-01: Destroying VM and associated drives...
Now, what I basically do when running these tests is that I run just the `molecule create` to create the infrastructure, and then I’ll just run `molecule converge` to test that my roles are working properly and `molecule idempotence` to verify that they are indeed idempotent. This helps reducing the duration of the feedback loop, which in turn helps me to develop faster. Just remember to launch the whole pipeline from time to time to check if your roles are able to correctly configure newly-created infrastructure.
Let’s play!
So if you followed all the steps correctly you should have a working Swarm cluster by now. Congratulations! Let’s see what it is capable of.
First, the smallest schedulable unit of work in a Swarm cluster is not a container, but a service. Let us create one of those on the leader node:
docker service create --replicas 1 --name redis --update-delay 10s redis:3.0.6
This says that we want to create a service, with one replica, with the name of redis, with a 10 second update delay, using the 3.0.6 version of the redis image. The update delay is the time between updates of tasks (containers) of a service. This means that the tasks will be updated one at the time, with a 10 second delay between them. You can then list your services using the `ls` command:
core@swarm-manager-01 ~ $ docker service ls

ID            NAME   REPLICAS  IMAGE        COMMAND

09j27f6ehaq6  redis  0/1       redis:3.0.6
And see information regarding the different tasks of the service using the `ps` command, with the service name:
core@swarm-manager-01 ~ $ docker service ps redis

ID                         NAME     IMAGE        NODE             DESIRED STATE  CURRENT STATE           ERROR

06cj3g824k8r0jjpoew0uip7z  redis.1  redis:3.0.6  swarm-worker-03  Running        Running 42 seconds ago
You can see the image, the desired state, the current state and the node in which the container is running.
You can also scale up/down your services, using the `scale` command:
core@swarm-manager-01 ~ $ docker service scale redis=11

redis scaled to 11
This scales your nodes up to 11. Sick!
core@swarm-manager-01 ~ $ docker service ps redis

ID                         NAME          IMAGE        NODE             DESIRED STATE  CURRENT STATE            ERROR

06cj3g824k8r0jjpoew0uip7z  redis.1       redis:3.0.6  swarm-worker-03  Running        Running 8 minutes ago

5wa862swszkvklchaug02powy  redis.2       redis:3.0.6  swarm-worker-02  Running        Running 25 seconds ago

67w0vlk9v7gh9h5qgwmsnjgya  redis.3       redis:3.0.6  swarm-worker-01  Running        Running 25 seconds ago

3ws3a9xwt1h4r962gg8htiun8  redis.4       redis:3.0.6  swarm-worker-03  Running

...
You can use the same command with a different number in order to scale down (to 1, for exampe).
Let’s try to update a service in order to see the rolling updates work. We’re going to go from redis version 3.0.6 to 3.0.7. Exciting, huh? For this, we will use the `update` command:
docker service update --image redis:3.0.7 redis
This will launch the rolling update process. It will take some time due to the update delay we set before. If you launch a `ps` command on the service, you should be able to see your containers updating:
core@swarm-manager-01 ~ $ docker service ps redis

ID                         NAME          IMAGE        NODE             DESIRED STATE  CURRENT STATE            ERROR

...

e8lf3q9ic8674fba8a863ciwh  redis.5       redis:3.0.7  swarm-worker-02  Running        Running 22 seconds ago

4b7wmnhc6iqod481ge5njvw7o   \_ redis.5   redis:3.0.6  swarm-worker-01  Shutdown       Shutdown 29 seconds ago

...

985dkagqrz8n40hke704an0pk  redis.10      redis:3.0.6  swarm-worker-01  Running        Running 3 minutes ago

0k4pn77hy4s6e3g778gohktnh  redis.11      redis:3.0.7  swarm-worker-01  Running        Running 3 seconds ago

4rn0r67hc8uscl0lq7kvx64t5   \_ redis.11  redis:3.0.6  swarm-worker-01  Shutdown       Shutdown 11 seconds ago
This should happens with every node eventually. You can see the service status if you use the `inspect` command on it:
core@swarm-manager-01 ~ $ docker service inspect --pretty redis

ID:             buye01j0ofdmt32lqplgvknic

Name:           redis

Mode:           Replicated

 Replicas:      11

Update status:

 State:         updating

 Started:       2 minutes ago

 Message:       update in progress

Placement:

UpdateConfig:

 Parallelism:   1

 Delay:         10s

 On failure:    pause

ContainerSpec:

 Image:         redis:3.0.7

Resources:
Once it’s done, you should be able to see the `completed` state on the same inspection:
Update status:

 State:         completed

 Started:       3 minutes ago

 Completed:     51 seconds ago

 Message:       update completed
Afterwards, when you’re bored with it, you can delete it using the `rm` command:
docker service rm redis
What about the Routing Mesh? Let’s try to expose a port. We’ll launch an nginx service with two replicas, and then we’ll try to access it on the node with no container workload. This way, we will see if the request is routed all the way to the corresponding backend, even when the backend is not hosted on the accessed node. Just a little reminder: when you expose a service using the Routing Mesh, you map it to a certain port, and the every node in the cluster listens on that port and routes the request all the way to the containers. So:
docker service create --name amazing-web-server --publish 8080:80 --replicas 2 nginx
By doing this, we will map the 8080 port on all nodes to the 80 port inside the containers. Let us then see where our containers are running:
core@swarm-manager-01 ~ $ docker service ps amazing-web-server

ID                         NAME                  IMAGE  NODE             DESIRED STATE  CURRENT STATE                   ERROR

6viw0duiqjobqwlajs8flrbk1  amazing-web-server.1  nginx  swarm-worker-03  Running        Running less than a second ago

8vmfut5b34e04h84ojvyaeb30  amazing-web-server.2  nginx  swarm-worker-02  Running        Running less than a second ago
We can see that they are running on swarm-worker-02 (10.0.0.122) and swarm-worker-03 (10.0.0.123). So, if we try to access 10.0.0.122:8080:

This isn’t that amazing
Cool, that works. What if we try to access swarm-worker-01 (10.0.0.121) though?
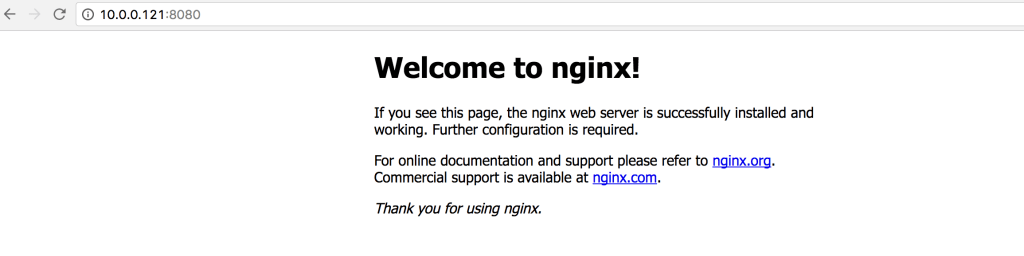
This is pretty rad
Now, you still need a reverse-proxy or a load-balancer in order to forward requests to the right Swarm node in order to access the right service, but still, the ease of use and effectiveness of the system is undeniable.
What about node failover? Let us find out!
Let us kill the Leader node first, to see what happens:
vagrant destroy swarm-manager-01 --force
No more Leader. Access the second manager node and see what’s going on:
vagrant ssh swarm-manager-02

core@swarm-manager-02 ~ $ docker node ls

ID                           HOSTNAME          STATUS   AVAILABILITY  MANAGER STATUS

1qmj079wp0cg5kys5ej8cs58i    swarm-worker-02   Ready    Active

3qeyfmoixwg7k64i6sw78gmms    swarm-worker-01   Ready    Active

3rgjfac5qau5rft2wpcpliaek *  swarm-manager-02  Ready    Drain         Leader

6ok8wzq137dxs7uow5xd3rjkd    swarm-manager-01  Unknown  Drain         Unreachable

9rarjje9gner4lwrcshymtszm    swarm-manager-03  Ready    Drain         Reachable

a1lsaawsrcoohajmc1luon0mn    swarm-worker-03   Ready    Active
So, swarm-manager-02 became the Leader. Sweet!
Before, we saw that the nginx containers were running on swarm-worker-02 and swarm-worker-03. Now, we will destroy both nodes to see what happens:
vagrant destroy swarm-worker-02 swarm-worker-03 --force
If we check the service status:
core@swarm-manager-02 ~ $ docker service ps amazing-web-server

ID                         NAME                      IMAGE  NODE             DESIRED STATE  CURRENT STATE                ERROR

95u3ndb01onpx6ki5daohuwf1  amazing-web-server.1      nginx  swarm-worker-01  Running        Running about a minute ago

3zx3cua2eu1dgykphj8rsnuwd   \_ amazing-web-server.1  nginx  swarm-worker-02  Shutdown       Running 7 minutes ago

aff0ashfqbcjxbka0jz6sbril  amazing-web-server.2      nginx  swarm-worker-01  Running        Running about a minute ago

8va90yo2vn2uwvzjrc22d0pjv   \_ amazing-web-server.2  nginx  swarm-worker-03  Shutdown       Running 7 minutes ago
We can see that the containers running on swarm-worker-02 and swarm-worker-03 are in ‘Shutdown’ state, and that there are two new running containers on swarm-worker-01.
What a time to be alive!
Final thoughts
This whole thing was fun. I (and hopefully you too) learned/noticed some things along the way:
- Swarm Standalone and Swarm Mode are two (very) different things. The latter is already integrated in the Docker Engine after v1.12.
- The Engine is divided into many different pieces as of today, including RunC and containerd, which are used to run the containers themselves and manage their lifecycle.
- The whole “let’s divide the Engine into little independent pieces” seems to have paid off, since every independent component is now evolving with its own lifecycle, and furthermore, it helps understanding the Engine as a whole.
- Docker uses a different container networking standard than Kubernetes, called CNM, with its own abstractions and resources.
- The Network Model, including CNM and the Network Routing Mesh seems easier to understand than the whole Kubernetes, even if it seemed harder to grasp before actually looking at it. I thought it would be hell at first, but it came out okay, kinda.
- Swarm works quite nicely as of now. It can handle the High Availability natively, and it doesn’t need an external key/value datastore like other solutions do.
- It is super easy to install. When I say super easy, I mean it’s super super easy. You should compare what we just did to what we had to do for the Kubernetes cluster, and you’ll see that these guys really worked their asses off in order to get the installation procedure right, nice and simple.
I would have liked to do some other things as well:
- Explore the volume management further (or at all). It’s a super interesting subject, and I’m dying to check it out. I’d love to compare it to the way Kube handles them.
- I didn’t get to deploy complex applications or services on the cluster. No DABs and no stacks. This seemed interesting enough, but I didn’t have enough time to actually try it.
- I didn’t get to compare the usage of a different key/value datastore instead of the internal one, in terms of performance or ease of use.
- Run some benchmarks on leader election convergence time. I just know it works, I don’t know how fast it can be, and how does that change when your Manager group increases in size.
I might do all of these things in the near future. Or not. Who knows. Anyway. I had a blast, I hope you did too!