Confluent.io – Part 2: BUILD A STREAMING PIPELINE
This article is part of a series designed to demonstrate the setup and use of the Confluent Platform. In this series, our goal is to build an end to end data processing pipeline with Confluent.
Disclaimer: While knowledge of Kafka internals is not required to understand this series, it can sometimes help clear out some parts of the articles.
BASICS
If you have gone through every step from our previous article, you should have a Kafka broker running along with Zookeeper and Control Center.
Now, we are going to implement a basic end to end data processing pipeline where the input data will come from Postgresql database (data source) and the output data will be dumped to AWS S3.

Kafka Connect is used to perform simple extraction from other systems to Kafka or from Kafka to other systems.
When it comes to streaming data from a database to Kafka, it usually requires hours of development from someone who’s able to understand both databases systems (e.g. how to activate CDC on a database for example) and the way Kafka works (e.g. how to produce to a Kafka topic).
Kafka Connect is meant to simplify the process by taking care of those bits. Kafka Connect is made out of four components:
- Connectors: they define where and how to copy data to/from Kafka.
- Tasks: for each connector, a number of tasks can be run in parallel, tasks actively use the connector definition and actually copy the data. Depending on the size or frequency of the incoming stream of data you may need to run multiple tasks. In that case, you’ll need to specify a topic to store the tasks state. The number of tasks defaults to 1 which means no concurrency.
- Workers: they are JVM processes executing the tasks (along with the connectors) you defined. Workers can work in distributed mode, spreading the load of tasks across workers and taking care of rebalancing tasks when a worker fails.
- Converters: used to translate data to Kafka Connect internal data format upon sending or receiving the data. Because converters can be reused across connectors they are not part of the connectors implementation. For example, when streaming data from a database system to Kafka, using the Avro connector (recommended) would transform data from Kafka Connect internal data format to Avro when producing to Kafka.
Under the hood what Kafka Connect is wrapping Java implementation of Kafka producers and consumers.
Now that we’ve cleared that up, let’s configure the necessary parts to make Kafka Connect work.
SETUP
Setup topics
Firstly, we have to create two Kafka topics, one where the incoming data from the database will be published and another one to publish the data which will then be written to AWS S3. We will insert a processing part in between the two topics later on.
Let’s keep it simple and deal with scalability later, we will set only one replica and one partition for those two topics.
kafka-topics --create --zookeeper localhost:2181 --replication-factor 1 --partitions 1 --topic confluent-in-prices kafka-topics --create --zookeeper localhost:2181 --replication-factor 1 --partitions 1 --topic confluent-out-prices
Run
kafka-topics --list --zookeeper localhost:2181
You should see your two topics, plus lots of other topics used by Confluent to manage the platform.
Setup Postgresql
Next, our purpose is to work our way to an end to end application. Usually, people tend to start off by pushing data incoming from SQL relational databases to Kafka so we are going to do just that by using a Postgresql database.
We could have used another database system but the Confluent supported connectors list does include PostgreSQL.
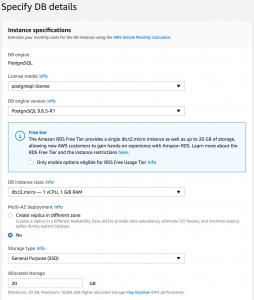
Let’s start an AWS RDS instance running PostgreSQL, choose the free-tier eligible instance, that way the cost will stay low. During setup always go for simplest configuration, we don’t need much.
Take note of your database name as well as your username and password.
You’ll also have to make sure the security groups attached to the RDS instance are allowing your Confluent AWS instance to access it.
Setup schema registry
We’ll be working with the Avro data format for messages published to Kafka. Avro is a data format which enables fast and compact SerDe, but not only, more on Avro here.
Using the Avro data format usually means the schema is embedded within the data which is fine for big data workload where a big schema still makes up a relatively small part of your file compared to the actual data.
Things are different when using Kafka because a big schema embedded with each message sent to the brokers could impact performance drastically. To avoid this effect a schema registry is available to store Avro schemas and serve them to producers and consumers using this data format.
When an Avro schema is registered, it is assigned a schema id which is in turn added to each message sent to brokers for connectors to retrieve the schema used to read/write the data from the schema registry. The schema will not be retrieved for each message as this would be constraining for the schema registry but is cached instead.
The Avro data format coupled to the schema registry is a great way to maintain a contract between the data producer and the data consumer while allowing for schema evolution without breaking the consuming applications.
When you feel the need to make your schema evolve (in our case imagine the database schema changes), you only need to make sure the new schema is compatible (BACKWARD, FORWARD, FULL) with the old schema. By following this contract, you ensure the consumer can still read the incoming data using the old schema i.e. depending on the type of compatibility chosen.
The schema registry enforces compatibility at its level when you attempt to register a new schema or if you modify the input table in your database while using Kafka Connect.
To enable Avro support we have to start an instance of the schema registry
schema-registry-start /etc/schema-registry/schema-registry.properties &
Setup Kafka Connect worker
Copy the template for Kafka Connect properties to a temporary location and activate Interceptors.
cp /etc/schema-registry/connect-avro-standalone.properties \ /tmp/worker.properties
cat <<EOF >> /tmp/worker.properties rest.host.name=0.0.0.0 rest.port=8083 consumer.interceptor.classes=io.confluent.monitoring.clients.interceptor.MonitoringConsumerInterceptor producer.interceptor.classes=io.confluent.monitoring.clients.interceptor.MonitoringProducerInterceptor EOF
We set the rest.host.name and rest.port to access worker information, configuration and management.
We also set the interceptor classes for the producer and consumer. Interceptors are used to examine and potentially modify messages passing by (e.g in Flume).
In Confluent’s case, it is used to send metrics to a specific Kafka topic which Control Center reads from and use to display and monitor usage metrics.
If you need to visualise metrics about your clients (broadly meaning producers, consumers and streams), they have to implement the interceptor provided by Confluent. This particular interceptor will send metrics to Control Center every 15 seconds.
You will be able to visualise things like latency (consumed_timestamp - message_timestamp), throughput, message count or checksums.
Note: The metrics published by the interceptors go to a topic configured by confluent.monitoring.interceptor.topic, it will default to _confluent.monitoring.
Note 2: If you have multiple Kafka clusters, it’s possible to make the interceptors of all clusters push inside this topic which is attached to a particular cluster. Obviously, you don’t want to have one Control Center for each cluster.
Inside this properties file, you can find offset.storage.file.filename specifies where to store offsets. In distributed mode, this would be posted to a Kafka topic. We’ll use that feature later on.
The following properties (already uncommented) enable Avro format as the one being used to transfer data from Kafka Connect format to Kafka.
key.converter=io.confluent.connect.avro.AvroConverter key.converter.schema.registry.url=http://localhost:8081 value.converter=io.confluent.connect.avro.AvroConverter value.converter.schema.registry.url=http://localhost:8081
The schema of the database table will be registered automatically to the schema Registry by the connector and then used for each message sent to a Kafka topic. For that reason, we need to provide the schema registry endpoint to the worker.
Finally, we need to make sure our worker knows our broker
bootstrap.servers=localhost:9092
Note: Avro schema registered to the schema registry is built using metadata from the database engine.
Note 2: When the schema of your table evolves, a new schema will be registered, however by default new schemas have to be backward compatible. To change this property, use avro.compatibility.level or use the REST API.
Note 3: You can develop your own connector
Setup input connector
Finally, let’s set up the connector by creating its properties file, we’ll name it postgresql-connector.properties and put it in /tmp,add the following properties in the file
name=connect-postgresql connector.class=io.confluent.connect.jdbc.JdbcSourceConnector tasks.max=1 connection.url=jdbc:postgresql://<rds-endpoint>:5432/<database>?user=<username>&password=<password> mode=incrementing incrementing.column.name=id topic.prefix=confluent-in-
The connector class is the name of the class for the Kafka Connect JDBC connector.
The number of tasks carrying data imports is set by tasks.max which defaults to 1. It’s worth mentioning that Kafka Connect does not support more than one task to connect to the same database table.
The connection.url should be set to the connection string of your RDS instance.
The properties mode and incrementing.column.name allows triggering an import every time the column id is incremented.
The property topic.prefix is used to send over data contained in a table in PostgreSQL to a topic starting with the property’s value.
Check that the database connector’s JAR (i.e. PostgreSQL) is available on the system in /usr/share/java/kafka-connect-jdbc/
Note: If you wish to add a new database connector, you can simply add it to the CLASSPATH.
Note 2: it is possible to separate classpath on workers for connectors that would share different versions of the same third-party dependencies.
On your AWS instance, install postgresql client
sudo yum install postgresql-server
Try to connect to your instance, <database> is “postgres” if you did not specify a database name when setting up RDS
psql -h <rds-end-point-url> -U <user> -d <database>
You’ll be prompted for your password.
Now create a table named prices like this
CREATE DATABASE <database>;
\c <database> CREATE TABLE PRICES(ID SERIAL PRIMARY KEY, ITEM VARCHAR(100) NOT NULL, PRICE REAL NOT NULL); INSERT INTO PRICES (ITEM, PRICE) VALUES ('laptop', 2000);
CONNECTING THE PIPES
In the previous part we assembled our worker and connector configurations, now let’s start Kafka Connect using them
connect-standalone /tmp/worker.properties /tmp/postgresql-connector.properties
After starting the worker and the connector you can use the schema registry REST API to query or update its properties. Run the following request, you will get the schema registered for your table in the schema registry
curl -X GET http://localhost:8081/subjects/confluent-in-prices-value/versions/1 { "subject":"confluent-in-prices-value", "version":1, "id":62, "schema":" { \"type\":\"record\", \"name\":\"items1\", \"fields\": [ { \"name\":\"id\", \"type\":\"int\" }, { \"name\":\"item\", \"type\":\"string\" }, { \"name\":\"price\", \"type\":\"float\" } ], \"connect.name\":\"prices\" }" }
This is the schema which has been automatically created from your table metadata in the schema registry. This schema will be used to serialise each message streamed to the confluent-in-price topic. It will be updated whenever the table changes its structure.
Let’s also test out the REST API for workers information and configuration e.g. to get a list of active connectors for a worker (you might need to open port 8083 in your AWS security group)
curl localhost:8083/connectors ["connect-postgresql"]
Let’s run an Avro consumer in the terminal:
kafka-avro-console-consumer --new-consumer --bootstrap-server localhost:9092 --topic confluent-in-prices --from-beginning {"id":1,"item":"pendule","price":100.0}
You should see the row you just inserted in your table. Keep the consumer running on one terminal and insert more data in your table. The data should flow from the database to Kafka in the same way.
You have successfully setup a stream of data from Postgresql to Kafka.

Take a look at your metrics within Control Center, you should see the message count incremented for your newly created topic. You can also see your Kafka Connect configuration in Kafka Connect > Sources
Note: You could also have set all this up within Control Center UI.
Now that we have created a flow of data from a database to Kafka, we need to configure the Kafka to AWS S3 flow.
FROM KAFKA TO S3
We are going to use Kafka Connect again to dump our data in the confluent-out-prices topic to AWS S3.
There could be several use cases for that, like keeping a data history, perform batch analysis/machine learning jobs on this data using Spark and Spark MLlib which all support Avro or index data in Elasticsearch for researching purposes.
Since we are trying to get data from Kafka to S3, we’ll use a sink connector packaged with Confluent. But first, you’ll need to create a bucket in S3 to dump your files.

Let’s create a file named confluent-s3.properties and add the following properties
name=s3-sink connector.class=io.confluent.connect.s3.S3SinkConnector tasks.max=1 topics=confluent-out-prices s3.region=ap-southeast-2 s3.bucket.name=confluent-demo s3.part.size=5242880 flush.size=3 storage.class=io.confluent.connect.s3.storage.S3Storage format.class=io.confluent.connect.s3.format.avro.AvroFormat schema.generator.class=io.confluent.connect.storage.hive.schema.DefaultSchemaGenerator partitioner.class=io.confluent.connect.storage.partitioner.DefaultPartitioner schema.compatibility=NONE
There’s a number of things to set here:
- topics should be the name of your output topic
- s3.region should indicate the AWS region in which your bucket is located.
- s3.bucket.name is the name of your bucket.
- flush.size determines the number of records after which a file will be committed to S3, set this to a small value to see the effect right away. You might not want to do that in a real-life production environment as writing to S3 can be slow.
You also need to configure AWS_ACCESS_KEY and AWS_SECRET_KEY environment variables and have correct access rights set for these access credentials so that the connector is able to write to your S3 bucket.
export AWS_ACCESS_KEY=******* export AWS_SECRET_KEY=*******
Note: You can also use AWS IAM roles.
We are going to reuse the same worker.properties we used for the source connector. If your database to Kafka connector is still running, stop it and then run
connect-standalone /tmp/worker.properties /tmp/postgresql-connector.properties /tmp/confluent-s3.properties
Both connectors will be managed by the same worker. Now try and produce data to confluent-out-prices topic
kafka-avro-console-producer --broker-list localhost:9092 --topic confluent-out-prices --property value.schema='{"type":"record","name":"prices","fields":[{"name":"id","type":"int"},{"name":"item","type":"string"},{"name":"price","type":"float"}]}' {"id":1,"item":"laptop","price":2000} {"id":2,"item":"tv","price":1000} {"id":3,"item":"ps4","price":500}
If everything is running you should see files under topics/confluent-out-prices/partition=0/s3_topic+0+0000000000.avro with the offset difference in each filename matching exactly the flush.size property.
To visualise the data, you can download and deserialize it by downloading the avro-tools jar and running
java -jar avro-tools-1.7.7.jar tojson <s3_topic>+0+0000000000.avro {"id":1,"item":"laptop","price":2000} {"id":2,"item":"tv","price":1000} {"id":3,"item":"ps4","price":500}
Now we have both a connector publishing incoming data to the confluent-in-prices topic and a connector publishing data from the confluent-out-prices topic to AWS S3.
In the next part, we will bring everything together and add processing to the mix as well as data exposition.
Sources:
- Images: https://www.confluent.io/blog/announcing-kafka-connect-building-large-scale-low-latency-data-pipelines/