Build your own “cloud machine” at home
You are reading this article, so it’s likely that you are a geek who loves to test software products and make complex infrastructure mocks like an OpenStack cloud. Seeing four or five desktops stacked in your living room doesn’t make your wife happy. Right? Your dream is to have a very monolithic machine made of several motherboards, switch, disks, power supply, DVD reader and network cards. It was also my dream, and once I decided to turn it to reality. In fact it was a must to study cloud technologies in good conditions. OK, it took me some time and money but it was a good investment! Let’s have a look at my “cloud machine:
Key features of the “cloud machine”
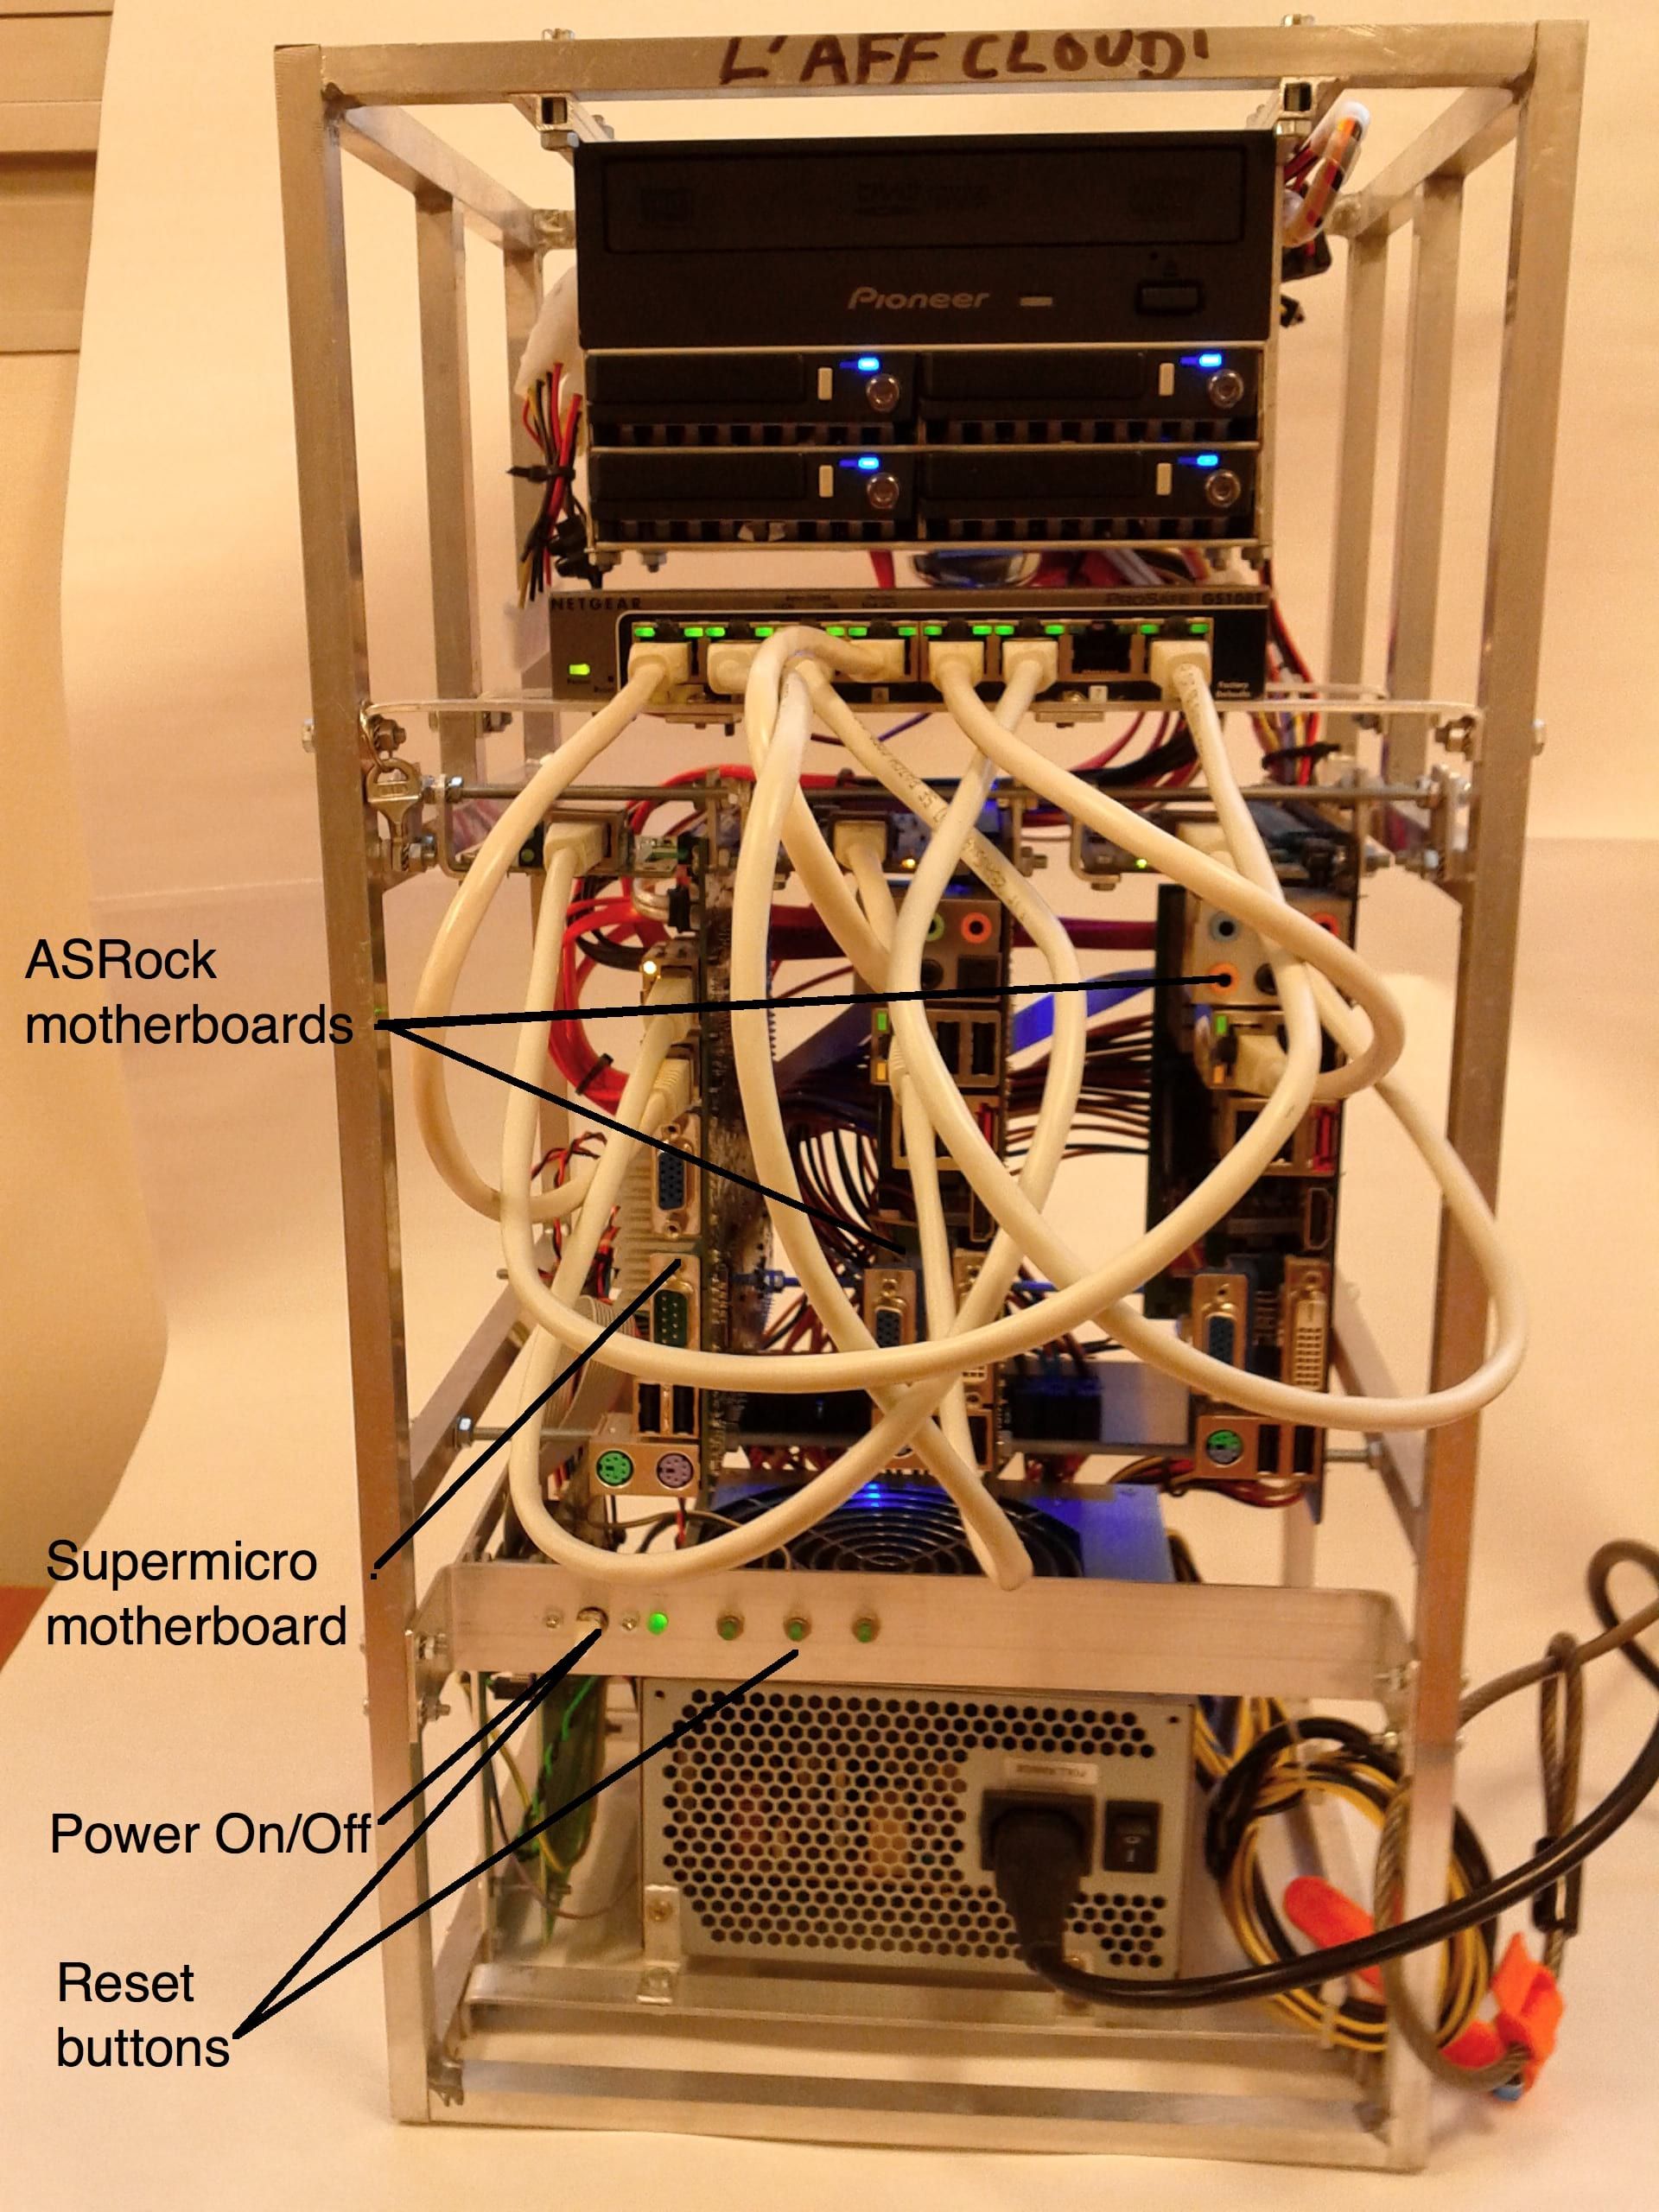
This machine is made of:
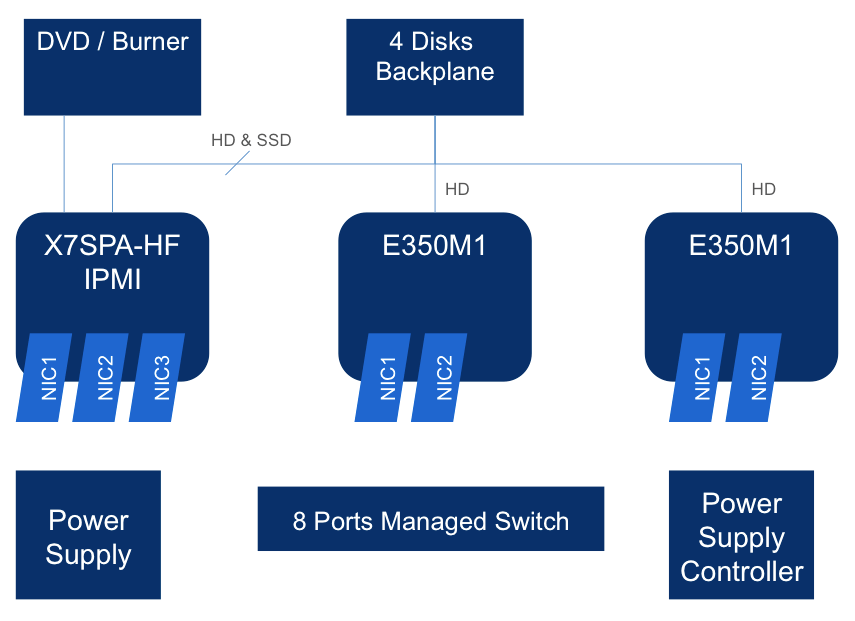
- 3 motherboards, 2 with virtualization capability
- 1 managed switch
- 1 backplane with 4 disks (3 HD, 1 SSD)
- 1 DVD reader/burner
- 1 power supply
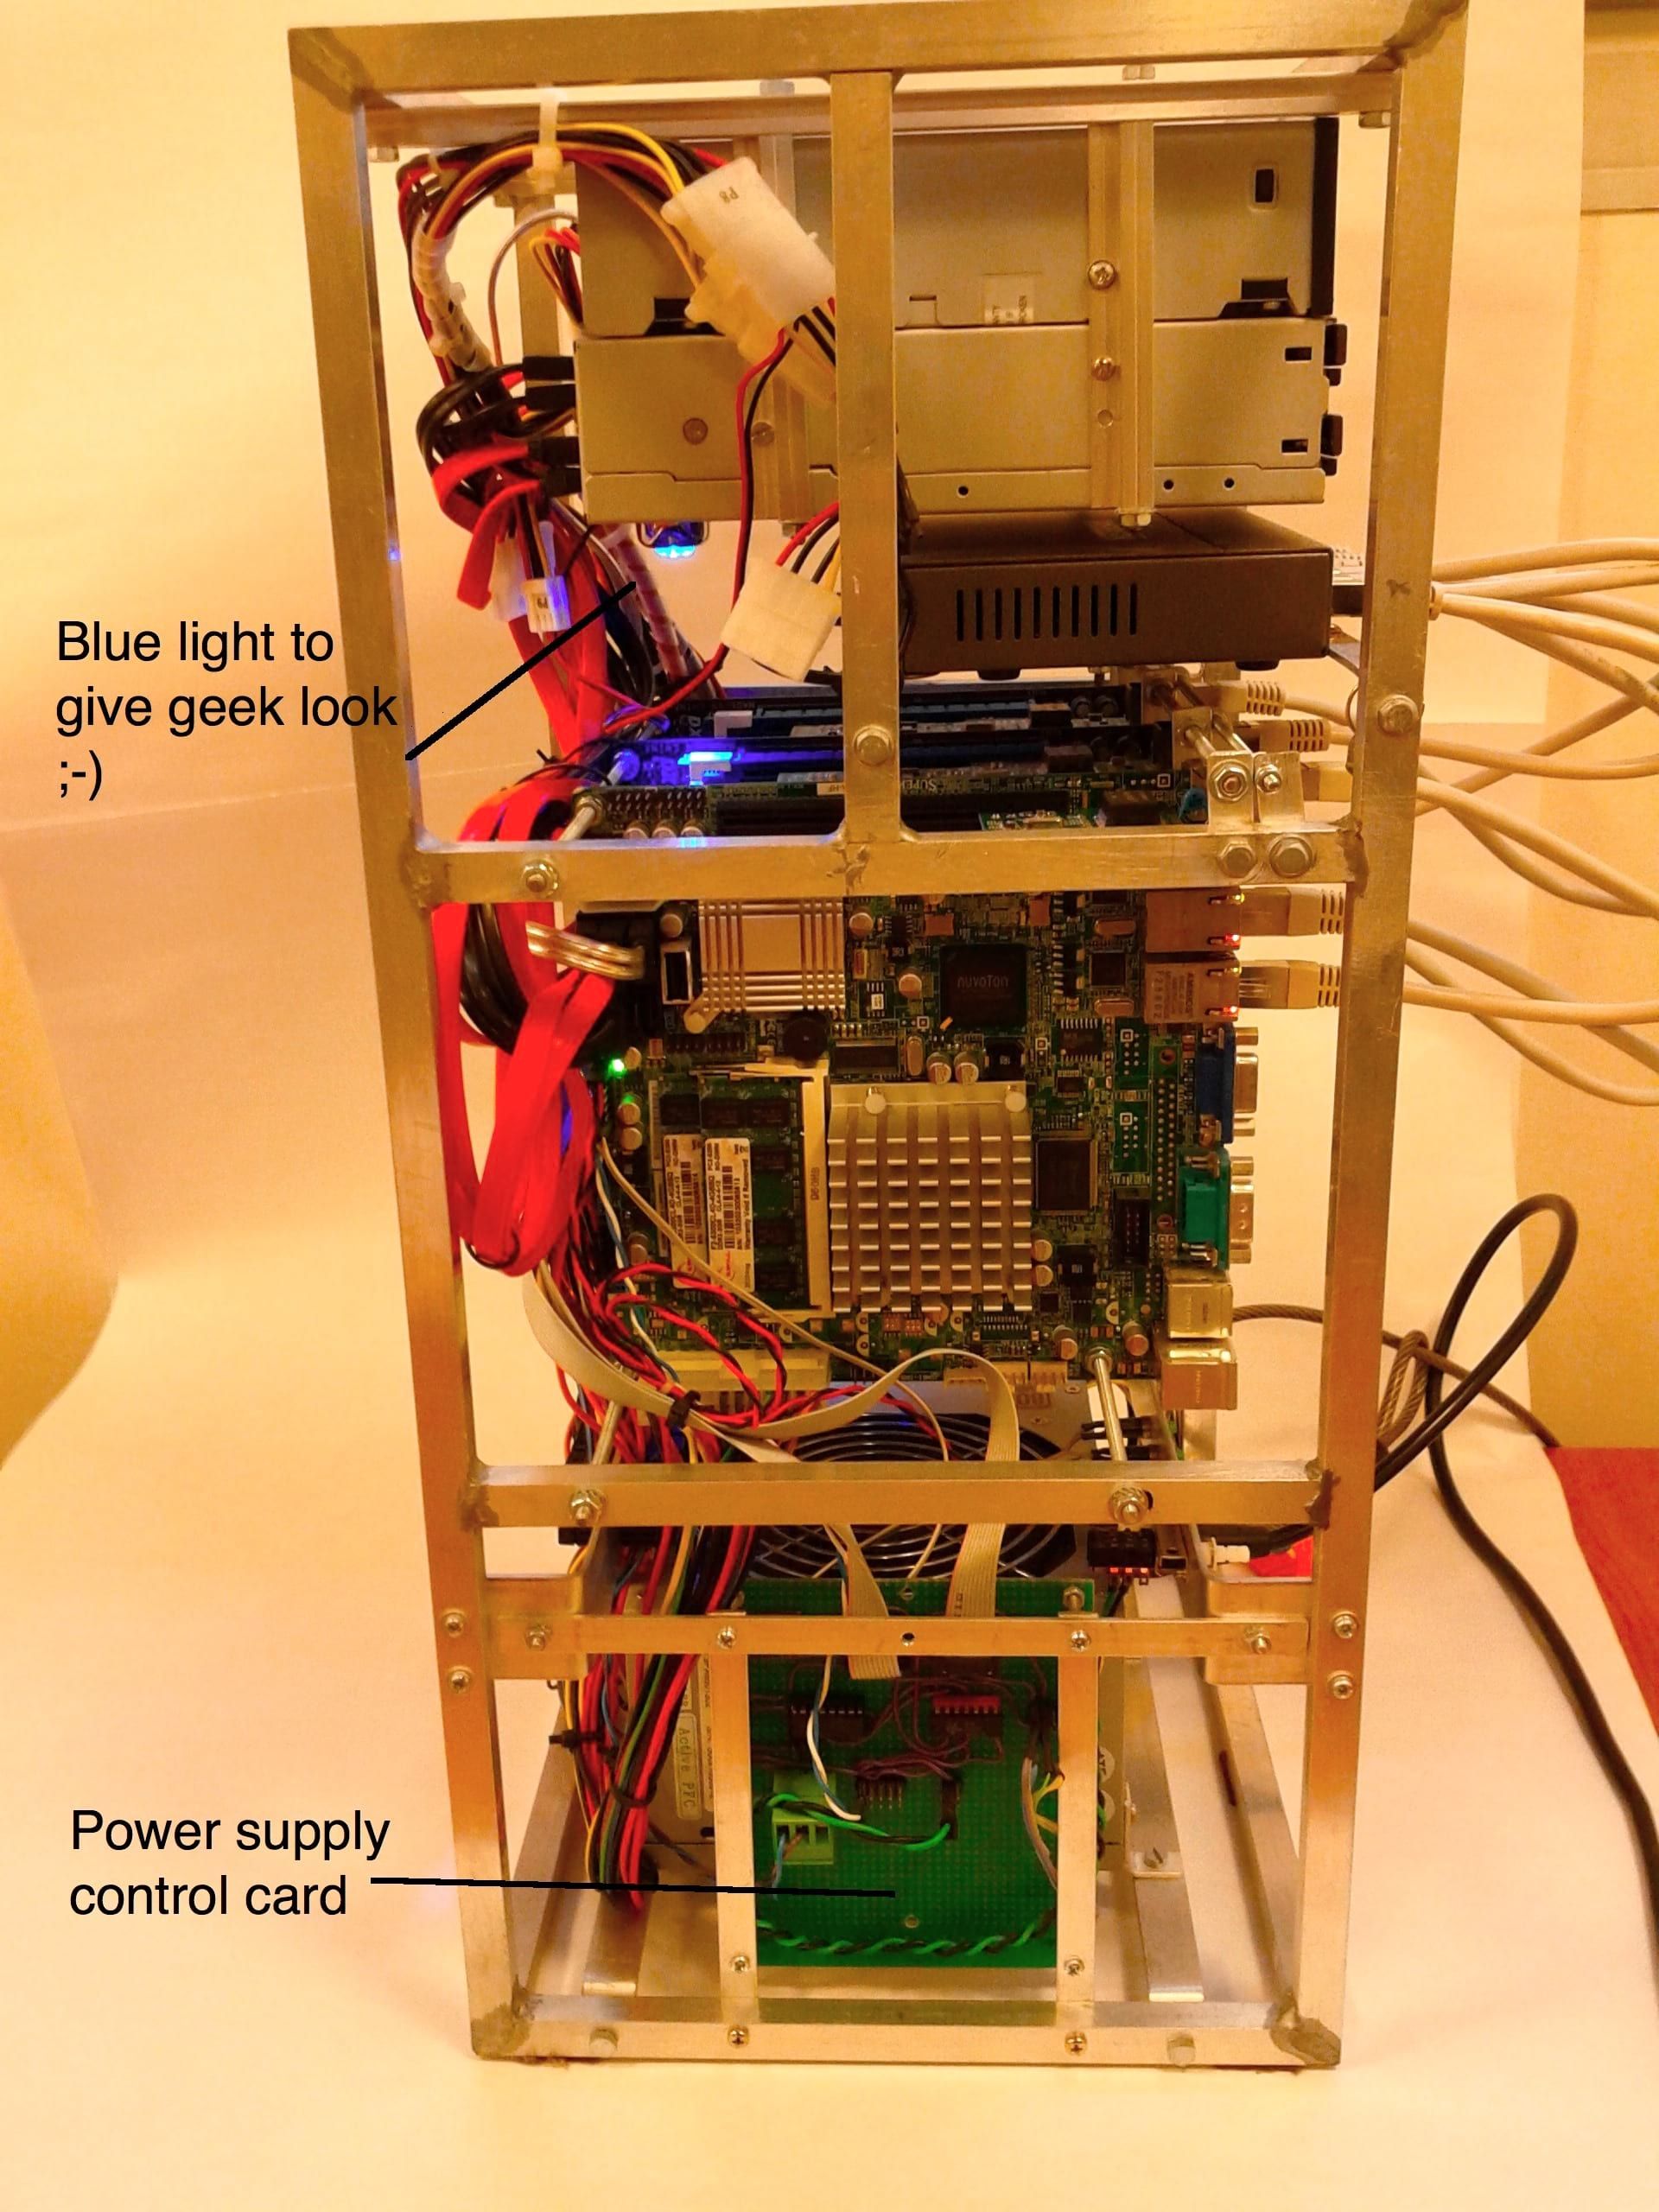
- 1 power supply control board
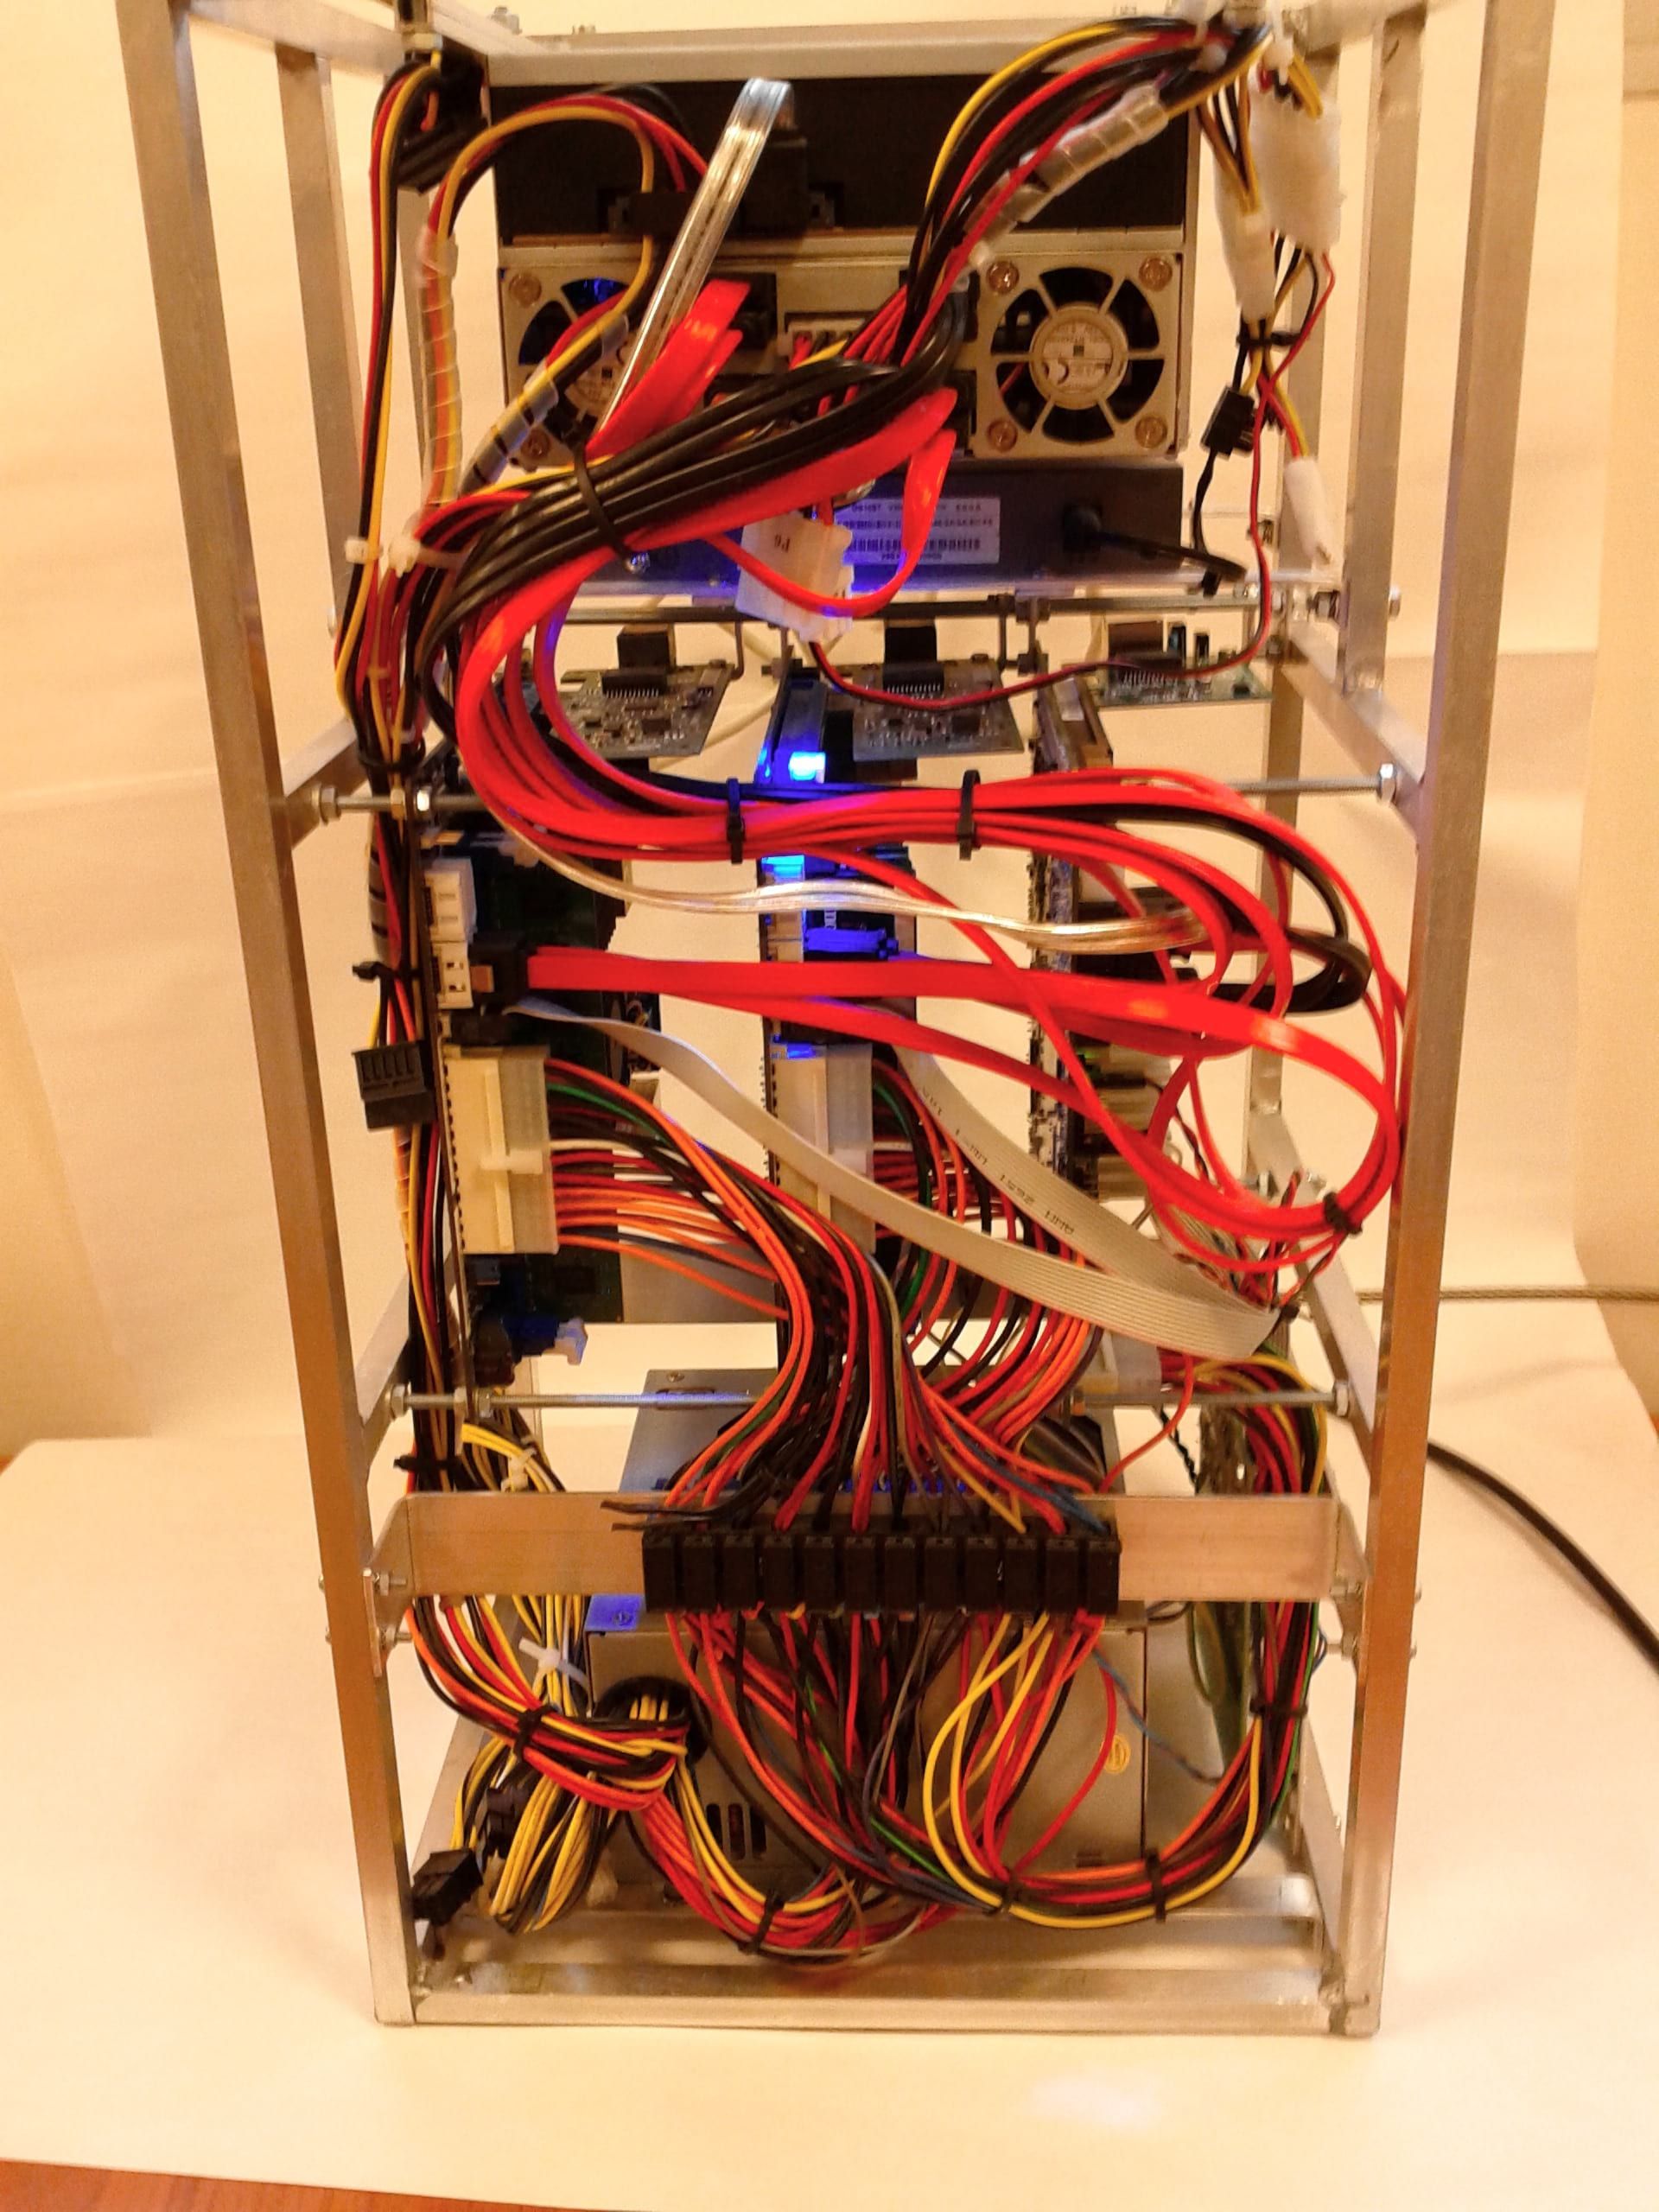
- Plenty of cables!
The architecture is as follows:
Choice of motherboards
Since my objective was to study cloud/virtualization and especially KVM, at least 2 CPU needed to support virtualization instructions. I was also looking for a small form factor because my home is rather small! I wanted all hardware Linux compatible and finally, my budget was also limited.
I chose to restrict my search to commodity hardware and to miniITX form factor. Most of miniITX available cards are based on Atom; so they don’t support virtualization instructions. I was disappointed by the lack of Atom Z series in commodity boards. But AMD saved me, by releasing the APU series. Finally, I chose the ASROCK E350M1.
This card provides very good value for the price, is simple to install and manage. But the key issue of commodity hardware is the lack of management functions: no IPMI, no ability to reset through the network, no SMB access… Then, I decided to use two ASROCK E350M1 as “compute” nodes, and to find a board with remote management capabilities as a “controller node”. Looking for such motherboard I chose the Supermicro X7SPA-HF. This board is rather expensive but has some interesting capabilities: IPMI onboard, access to SMB, 2 Ethernet ports, passive cooling…
Choice of the network cards
Transferring gigabytes of disk images on the network requires serious bandwidth. I could not afford 10Gbps cards for obvious price reasons, so I chose the Intel PRO/1000 CT which supports jumbo frames (useful for heavy payload) and some other interesting features. It is affordable and close to what is found in mid range servers environments.
Additionally their form factor is compatible with compact integration.
Choice of the switch
Ability to make VLANs was a primary requirement. But the price was a key issue since most managed switches are made for large installations and not for SoHo applications. I chose the Netgear ProSafe GS108T which offers great value for the price and allows to prototype most of usual network cloud configurations (VLAN, DHCP snooping…).
Choice of RAM and disks
I chose common low cost hardware that one finds on good shops on the Internet. Compute nodes can bear up to 8 GO.
The disk backplane, an ICY Box IB-2222SSK, is a very important device for the mechanical integration. However, I had some compatibility problems with the disks and the ICY Box. First, the mechanical aspect of the device (difficult to insert the disk in one slot) and second, Samsung disks that could not start rotating visibly for obscure power supply reasons. I managed to make it working with Hitatchi disks and I am finally pleased with this configuration. I advice to test some alternative solutions (not easy to find on the market however…). Nothing to say about the DVD reader/burner, except it’s a SATA interfaced device.
Choice of power supply and control
This is the most custom made device of the Cloud machine, as well as the mechanical structure. In fact, PC power supplies are not designed to drive more than one motherboard.
To catch the design stakes, you have to know how an ATX power supply is controlled. Look at ATX article on Wikipedia and ATX12V PSDG2.01.pdf (search on Google).
There are two main issues:
- Make sure that Power on sequence (power and reset) is correct for the 3 motherboards using only one power on button;
- Shutdown of power supply shall be effective only if the 3 motherboards are in shutdown state.
I intended to design a control board to make all these controls. In fact, I only did a first version, very simple (based on TTL gates) which insures the correct power on sequence. But shutdown is done only from the Supermicro board. At the moment this design is sufficient, but I plan to make a control board based on Microchip PIC micro-controller that will implement all necessary logic.
The power supply is a 650W EPS, but a low cost 450W ATX would be sufficient.
Mechanical design and structure
Stacking motherboard is a pattern that makes me dreaming ;-) and I chose to reproduce such arrangement.
Overall dimensions of the cloud machine are 23cm x 26cm x 52 cm.
I chose to put the power supply on the bottom part of the structure for several reasons:
- The PSU fan blows up, pushing warm air in its upwards natural flow;
- The center of gravity is close to the bottom of the structure.
The drawback of this design is that dust falls into the PSU when it’s turned off.
Electric ground is connected to the whole structure through the PSU screwing.
All parts of the “Cloud machine” are in aluminum except steel thread bars that support the motherboards. I have a welding torch and aluminum solder which is fairly easy to use. A simple metal saw, a basic drill and some metal files make you able to do it as I did.
Further improvements
The next version of the control board will implement :
- Enhanced power supply control (common synchronized switch off);
- The ability to reset the ASROCK motherboards from the Supermicro motherboard (using USB port and a USB microcontroller on the control board).
Conclusion
It took me several week-ends to achieve this machine and I am really pleased to use it for my new software mocks. I spent around 2000 € in total. I had almost a heart attack when I saw that ASROCK motherboards didn’t support virtualization. But after BIOS update, they did as promised!!
The next blog article will present how this Cloud machine is installed with Linux and operated using PXE and SSH.
Have fun making your custom machines!