Build your first Instant App!
You are an adept of Android App Links and you find wonderful being able to suggest your users to install your application or to redirect them from your website to your application with specific data relative to their requests? Well, forget (almost) everything you know.
Since Google I/O last week, Google released to developers what comes as the biggest news in the Android development world: Instant Apps.
Instant Apps are applications that can be executed instantly, from anywhere, without having to be installed on your smartphone. You can thus display a map, place an order or show news through your application, without installing it, from a simple tap on a link coming from a website or even from a simple text message.
This article will be an overview of Instant App in order to let you start using it in your own development. We will not go into details as the Android developer website already does it very well. And the good news is that you will be able to use it in your existing application without having to rebuild it from scratch!
What you'll need
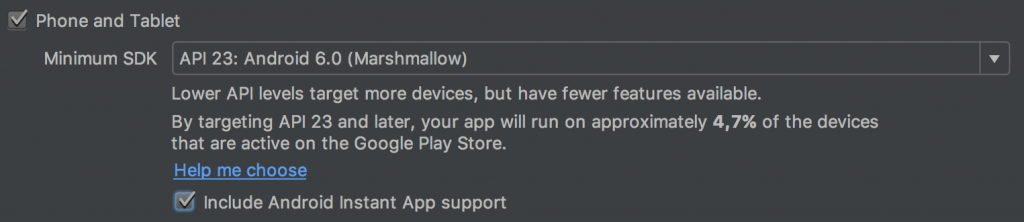
In order to start developing with Instant App, you will have to install the early version of Android Studio 3.0 (Canary 1) and the Instant Apps SDK (available through the SDK Manager). You will also have to set your project to minimum API level 23 (Android 6.0), support for API level 21 (Android 5.0) will come soon. Also, Android App Links are used in Instant Apps but you don’t necessarily need to be familiar with them to start building your first app.
How does it work?
Understanding how Instant Apps work is pretty easy and can be summed up in 3 big parts:
1 – Imagine your application not as a whole, philosophically separated in features but as independent features grouped under a common base (yes, there is a difference).
2 – Now, clean that up and only keep the common bare minimum to all the features of your application in that same common base, and split the rest between these features.
3 – Finally, associate each feature to a unique URL and let Google Play take care of the rest.
Google Play will analyze the request, check if there is an Instant App matching the URL pattern and will send the common base code (base feature APK) and the requested feature code (feature APK) to the user. If the URL does not match, the Android system will be alerted and an intent will be broadcasted.
Thus, when a user wants to use feature n°3 of your application, he will only receive the necessary code to execute feature n°3, which will then be removed by the system after use. Let’s assume that the installable application has 10 features, we easily guess the performance gain, and so the user experience, when that same user will only receive the necessary code allowing him to use only one of these 10 features.
Also, when the user will have received the code of a feature and its common base, if this user wants to use another of the features, he will just have to download the code of that other feature without having to download the common base code again. Performance and user experience gain, again.
Instant Apps are secured and can only obtain the same capabilities as installable applications (camera, location…) by using the Permissions at Run Time API. For that same sake of security, some capabilities are not available on Instant Apps like access to external device storage.
That’s it! You now have an overview of how Instant Apps work. You liked it so far? Let’s continue then.
How to use it?
In order to build you first Instant App, let’s create a new project on Android Studio 3.0. You can now include Instant App support which will let you configure the route of your main feature.
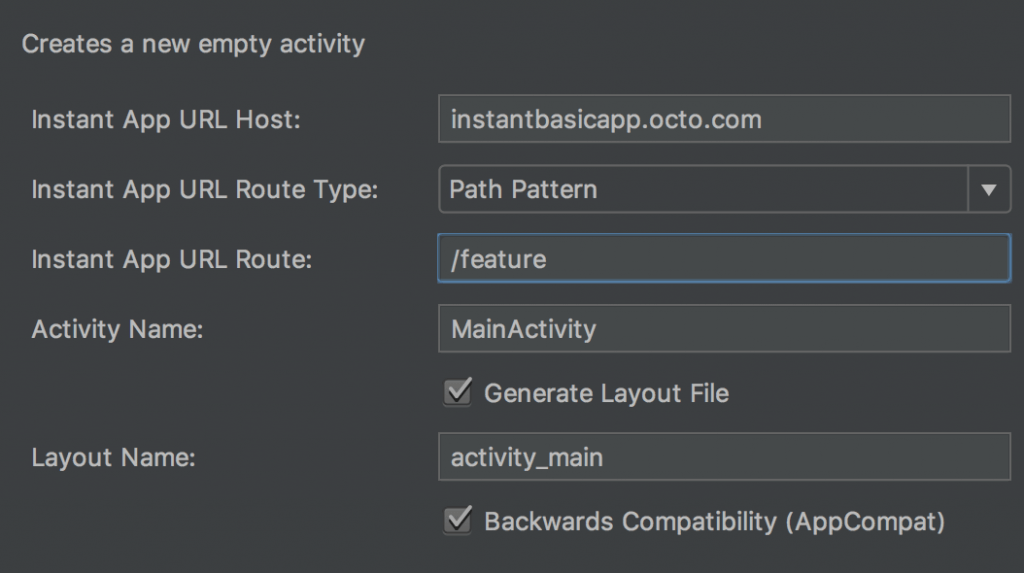
Thus, when a user will tap the link https://instantbasicapp.octo.com/feature, Google Play will only send the code allowing him to execute the feature “feature” of your application.
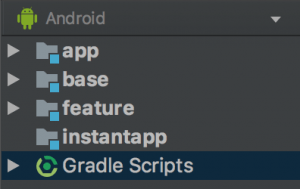
You then obtain 4 modules:
The app module:
This module uses all of the features of the application in order to build the installed app APK. Its build.gradle file applies the com.android.application plugin and depends on the base and feature modules necessary to build the installable APK (in this case: base and feature).
app/build.gradle
apply plugin: 'com.android.application'

android {
    //...
}

dependencies {
    implementation project(':base')
    implementation project(':feature')
}
The instantapp module:
This module pretty much has the same responsibility as the app module, but for the Instant App. It is empty and is only necessary to build the Instant App APK with all the features of the application. Its build.gradle file applies the com.android.instantapp plugin and depends on all the modules used to build the feature APK (in this case: base and feature).
instantapp/build.gradle
apply plugin: 'com.android.instantapp'

dependencies {
    implementation project(':base')
    implementation project(':feature')
}
The base module:
Each feature module depends on the base module. It only contains the shared resources and builds a base feature APK for Instant Apps. However, all of the application code can be in this module if the application only has one feature. Its build.gradle file applies the com.android.feature plugin and references all of the features of the application. It also specifies that it is the base feature with the baseFeature property.
base/build.gradle
apply plugin: 'com.android.feature'

android {
    //...
    baseFeature true
    //...
}

dependencies {
    feature project(':feature')
    //...
}
The feature module:
Each of the features of the application is defined within a specific module. This module holds all of its own resources, nothing more, and builds a feature APK for the Instant App and a AAR for the installable application. It must contain at least one entry-point as an activity which will be the main element displayed to the user. Its build.gradle file also applies the com.android.feature plugin and specifies its dependency to the common base module.
feature/build.gradle
apply plugin: 'com.android.feature'

android {
    //...
}

dependencies {
    implementation project(':base')
    //...
}
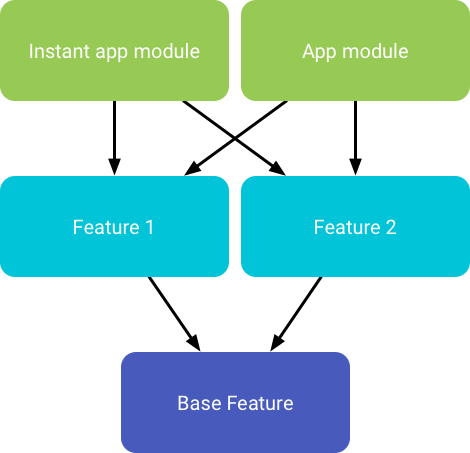
Here is a diagram taken from the Google documentation which represents the above architecture. We can see the instant app module and the installable app module which are dependent of each feature module, themselves dependent of the base feature module.
Want more features?
In the following, the architecture of our application has been updated: "feature" becomes "feature1" and a "feature2" has been added.
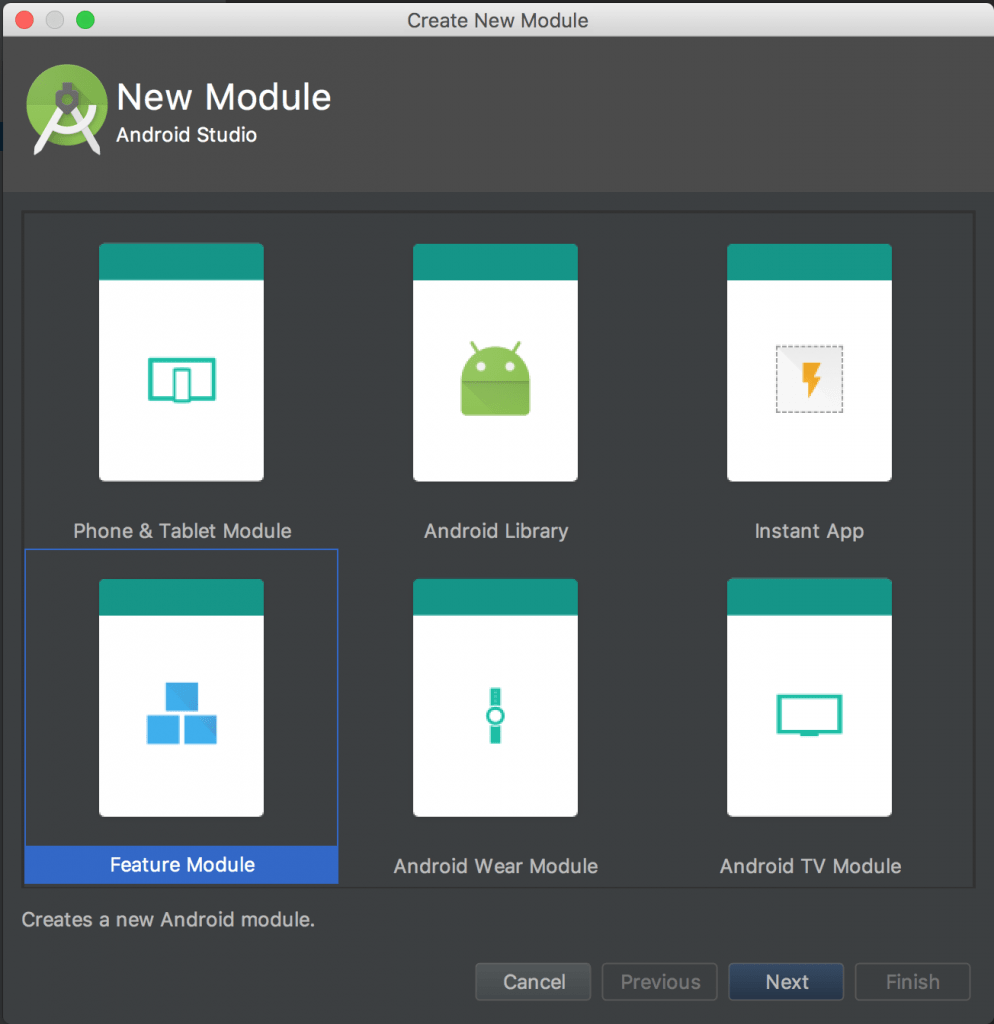
You will then be able to add as many features as you want, each of them containing its own resources (colors, strings, drawables…) and, if needed, its own entry-point. Adding a new feature to your Instant App is very simple, as Android Studio 3.0 now provides two new types of modules: Instant App and Feature Module. Select Feature Module to add a new feature to your application.
Note that each feature is built as a library and will then have to be declared with a different package name from the application one.
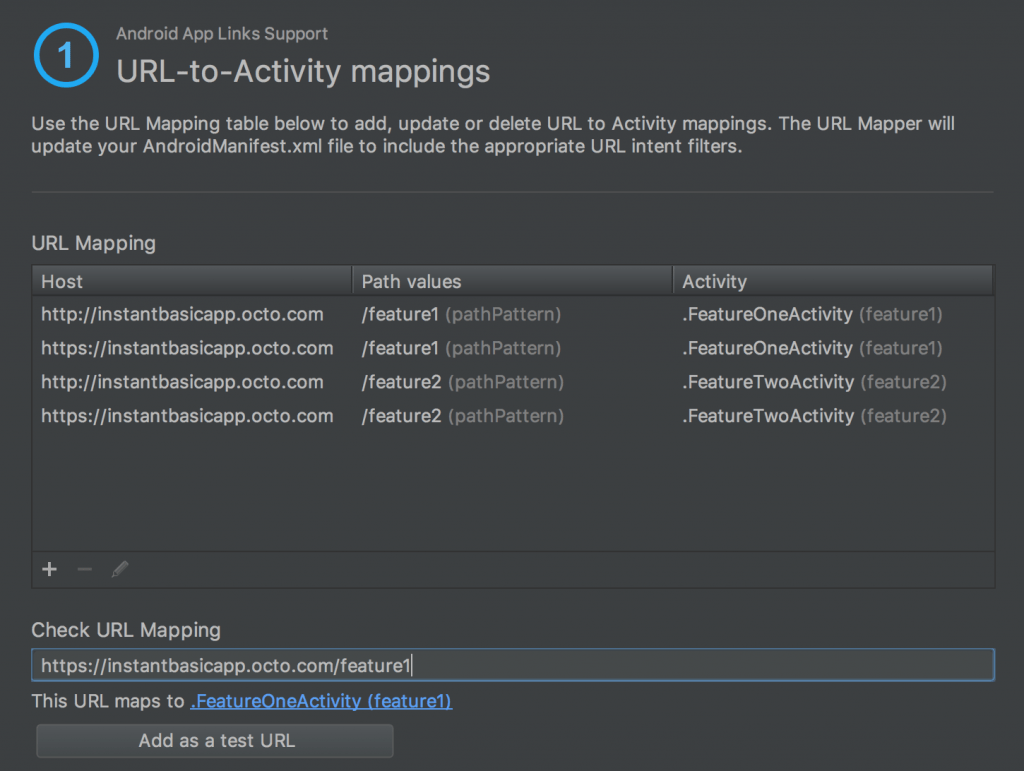
Within each feature, you will now have to add specific entries to the AndroidManifest.xml. Thus, you will specify the matching URL with a host, a pathPattern and a scheme. The entry-point of your application will need an <intent-filter> with the android.intent.category.LAUNCHER and the android.intent.action.MAIN attributes to allow Google Play to discover your app. In that same entry-point manifest, you must also define the default-url of the app using a <meta-data> element providing a valid HTTPS URL.
It is also necessary to add a priority level to the matching of the URLs of your features in order to enable Google Play to determine which feature to pick. For instance, if your application provides two features based on the same URL that you can eventually complete with an ID, a different level of priority will be attributed as follows:
https://instantbasicapp.octo.com/feature will have a priority of 1 https://instantbasicapp.octo.com/feature/<ID> will have a higher priority of 100
feature1/src/main/AndroidManifest.xml
<?xml version="1.0" encoding="utf-8"?>
<manifest
    package="com.octo.instantbasicapp.feature1"
    xmlns:android="http://schemas.android.com/apk/res/android">

    <application>
        <activity android:name=".FeatureOneActivity">
            <intent-filter>
                <action android:name="android.intent.action.MAIN"/>
                <category android:name="android.intent.category.LAUNCHER"/>
            </intent-filter>

            <meta-data
                android:name="default-url"
                android:value="https://instantbasicapp.octo.com/feature1"/>

            <intent-filter>
                <action android:name="android.intent.action.VIEW"/>
                <category android:name="android.intent.category.DEFAULT"/>
                <category android:name="android.intent.category.BROWSABLE"/>

                <data android:host="instantbasicapp.octo.com"/>
                <data android:pathPattern="/feature1"/>
                <data android:scheme="https"/>
                <data android:scheme="http"/>
            </intent-filter>

        </activity>
    </application>

</manifest>
Once that your second feature is ready, you may want to navigate to it from the previous feature. How? Well, each feature can be independently accessed from a unique URL so... Yep, you just guessed right. When running as an Instant App, you can navigate through features using intents configured with the Intent.ACTION_VIEW action and a Uri.
Now that your application is ready, select the instantapp module in the target selection dropdown and launch it on your device or on your emulator. You now have the feature running on your device, but if you check the launcher, you can see that the application has not been installed!
Manage your URLs
Android Studio 3.0 also offers an assistant allowing you to test your URLs matching. Select Tools --> App Links Assistant to display this assistant. It will allow you to manage your URLs by checking locally your matching, add logic to your URL-mapped activities enabling you to transmit data to them, associate your application to your website through Digital Asset Links, or execute manually typed URL directly to your device or emulator.
Note that if the domain ownership of a URL is not verified, you will not be able to publish your Instant App.
Voilà ! Your first Instant App is ready and you now have all the tools in hand to start using this in your development.
Want more?
This article is mainly based on the Android Instant Apps documentation from Google. In this documentation, you will find numerous information about good practices of Instant App development, managing of permissions, authentication and In-app Billing. There also is a really good FAQ section containing many interesting information like how to deploy your Instant App on Google Play.
I also highly recommend that you go and check the “Building an Android Instant App (Google I/0 ’17)" which shows a live-coding of the refactoring of an existing Android application to an Instant App and ça vaut le détour !
Finally, you will find samples here which demonstrate single and multiple features Instant Apps.
Enjoy!