Authorisation for AWS S3 static website
Hi,
Today I'm going to tell you a story about a feature we wanted to implement to secure a website by adding authorisation to it.
TL;DR:
Authorization:
- plan your authorization flow in advance, with all involved calls and pages
Lambda@Edge:
- keep html content out of the lambda code
- keep lambda code as simple as possible
- it could be tricky to find your lambda logs in CloudWatch
Check out the code at https://github.com/ilya-v-trofimov/s3-site-auth
Intro
It might seem to be a trivial task, but the website happened to be a static website on AWS S3. And it turns out that there is no out of the box mechanism in AWS to add authorization to S3 static website
So, we started to think about a solution.
And we’d been thinking for 3 days and 3 nights and finally came up with the plan.
Idea was simple:
- Start with something very basic, like single HTML page on S3 bucket
- Gradually add complexity, including authorization functionality
- Apply solution to the whole website with js/css/images
CloudFront + Lambda + S3
Keeping that in mind, we have set about implementing the first step.
One of the requirements we had to consider was to keep the solution serverless, with pay-as-you-go paradigm: this would allow to run a website almost for free, since low traffic was anticipated and there was no point in running whole EC2 instance for that.
We scratched heads and drew this:
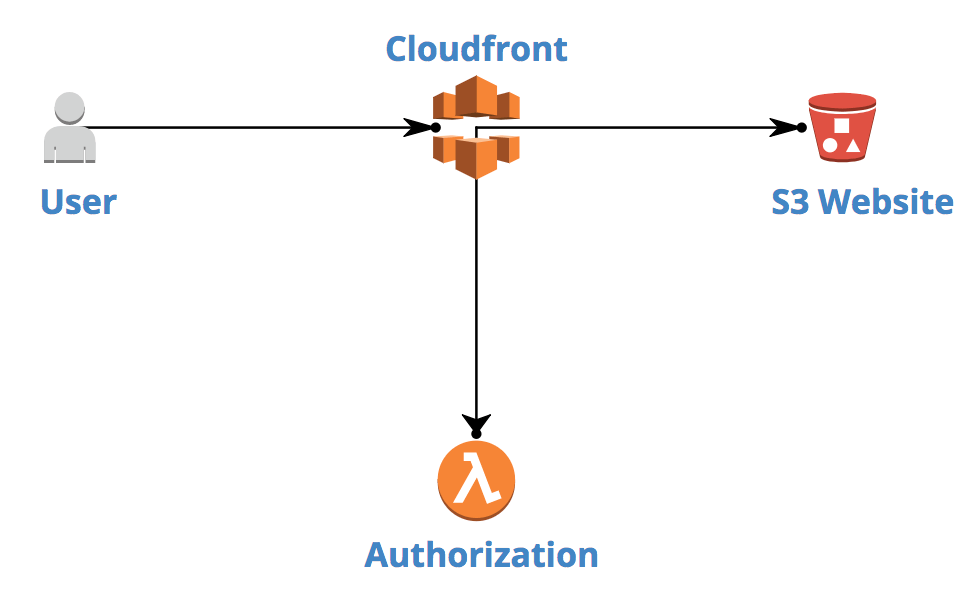
Basically, a User accesses the AWS CloudFront distribution URL via his browser. CloudFront (AWS CDN solution) allows to run Lambda@Edge against every HTTP request to particular resource. If request is authorized, CloudFront serves S3 Website data. If not, 4xx error is sent back to User. This is oversimplified explanation, but we’ll dig into details together soon.
Authorization
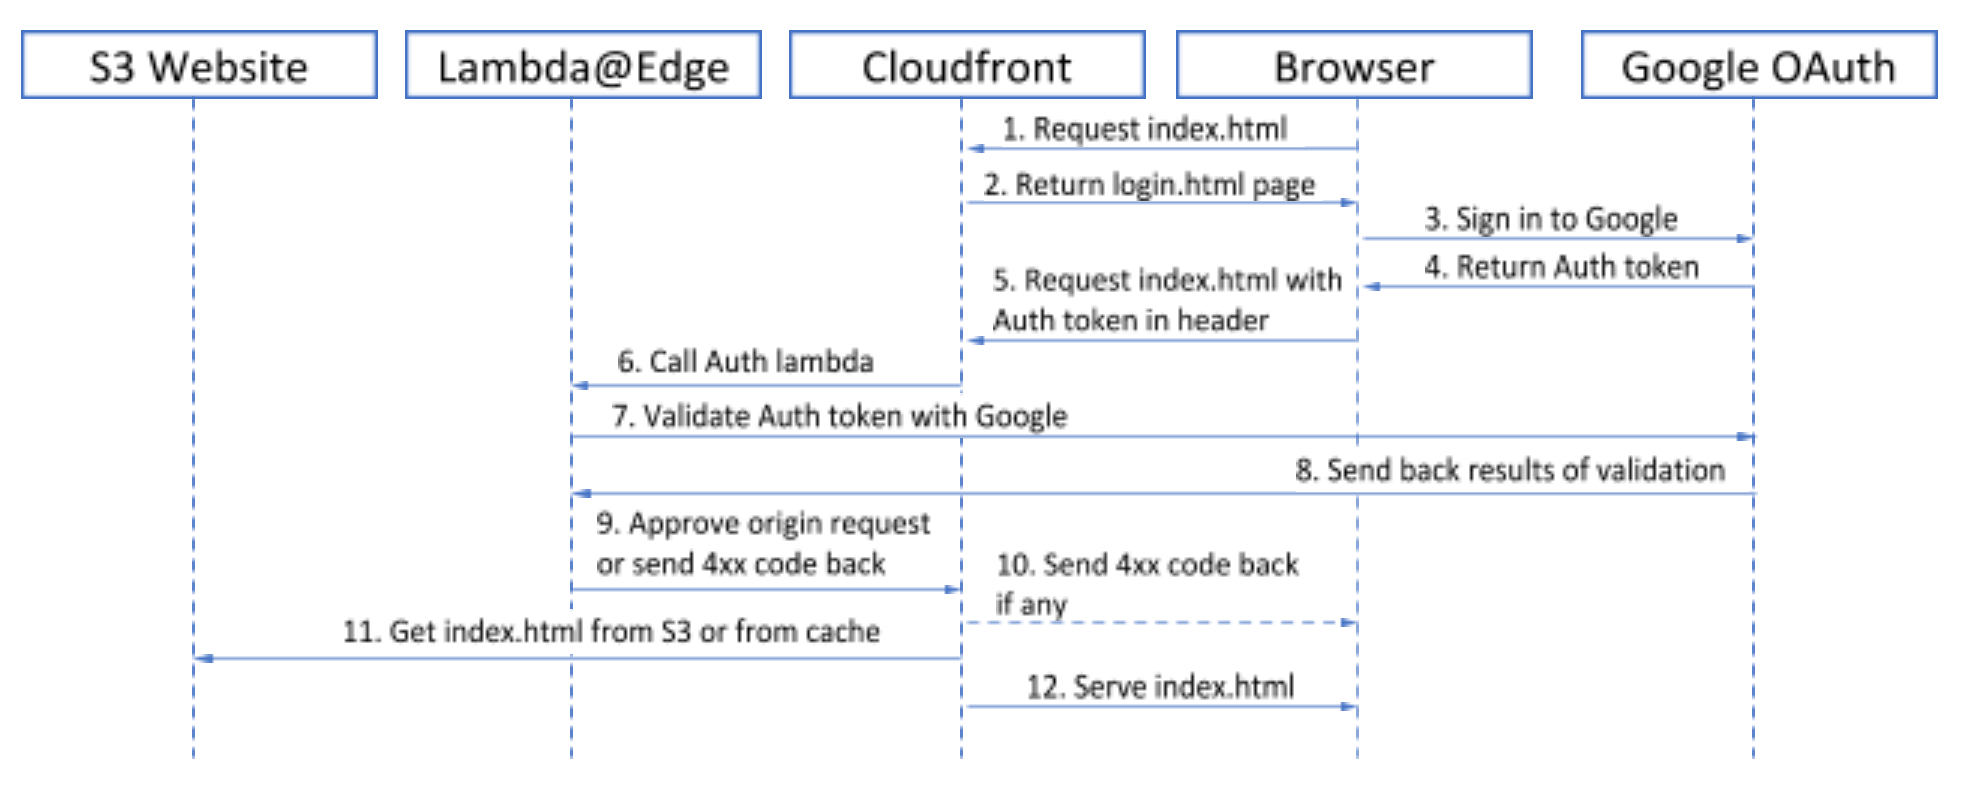
Since all users of the website are supposed to have a corporate Google account, we have decided to use Google’s OAuth 2.0 service for the website user authentication. Google provides some developer’s documentation on that here, however one should be familiar with OAuth 2.0 authorization options in order to choose proper help topic. In our case, we need two parts: Client- and Server-side functionality. Process flow looks as follows, index.html is used as an example:
Client side
This is a HTML page to be displayed in User’s browser. This should
1. render a Google’s Sign-in button
2. let User sign-in to his corporate Google account
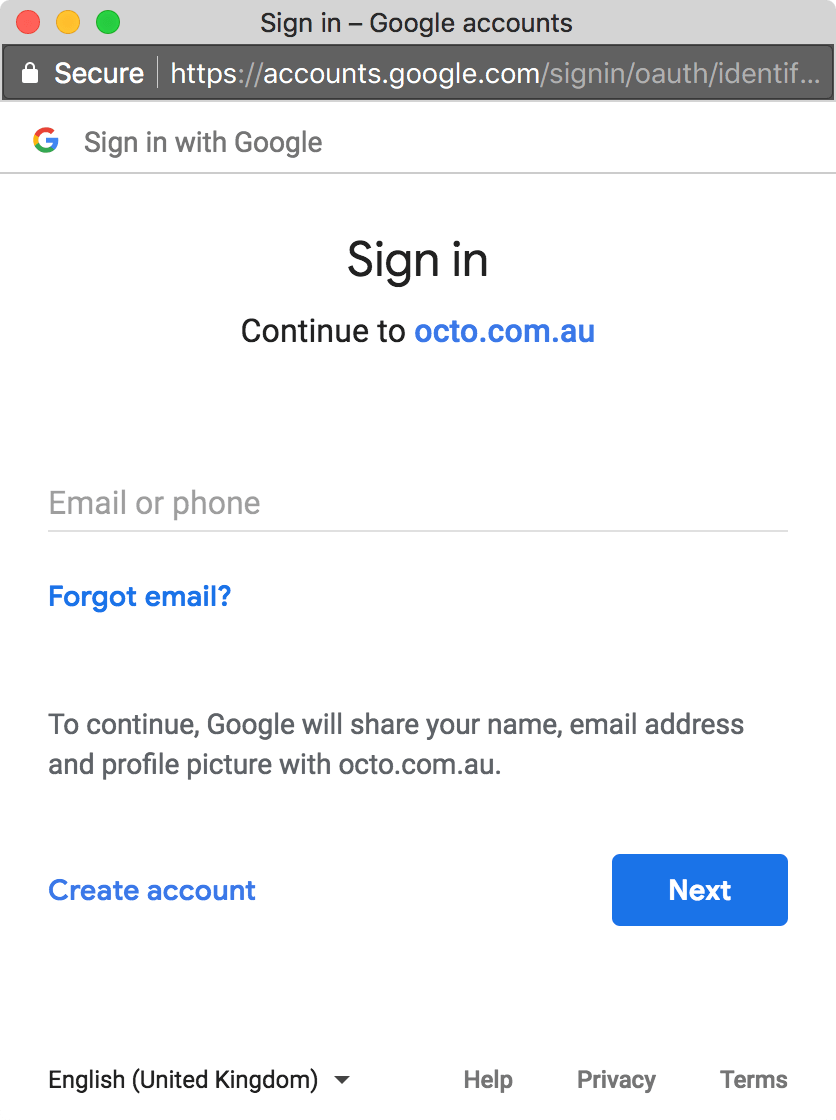
3. and obtain OAuth token, which then to be sent in Authorization header to a server along with HTML page request.
This is more or less covered in https://developers.google.com/api-client-library/javascript/samples/samples#authorizing-and-making-authorized-requests
and some api description is available here: https://developers.google.com/identity/sign-in/web/reference
As you may have noticed on authorization flow diagram there are two resources mentioned: index.html and login.html.
Well, in fact, there is another one: main.html
Basically, main.html
- takes over Sign in/out controls from login page
- wraps index.html in an iframe.
This approach is taken to be able to obtain Auth token in one page (login) and then use it when requesting another one (index):
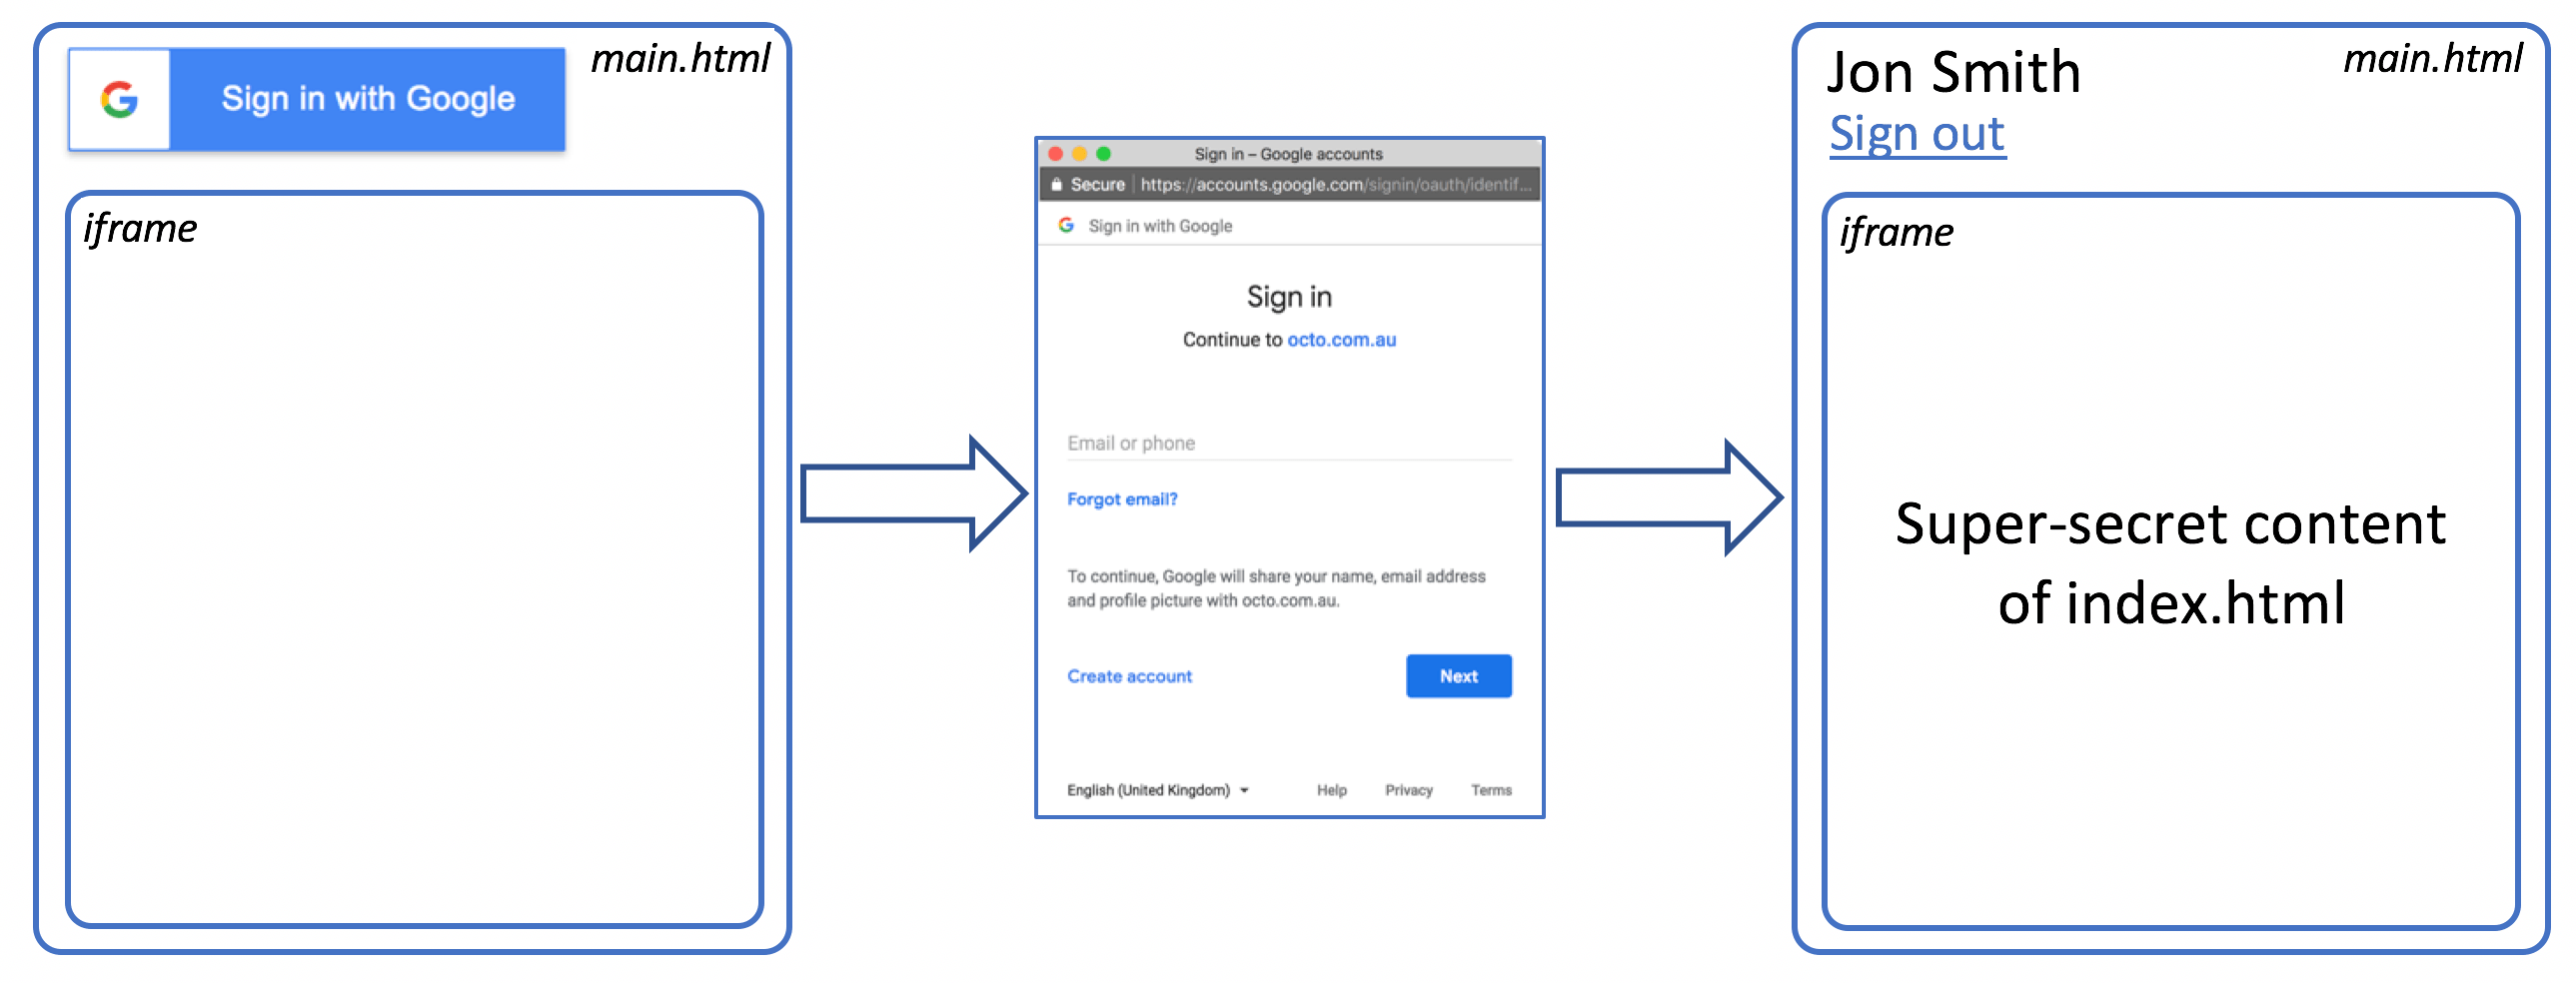
So, once authorization token is obtained, we use XmlHttpRequest object to send a GET request for index.html, containing our sensitive content. We also attach authorization header with token to the request.
Some code snippets and configuration required for this to be implemented is described in details in https://developers.google.com/identity/protocols/OAuth2UserAgent
In addition, please check out full code of the main.html page on github: https://github.com/ilya-v-trofimov/s3-site-auth/blob/master/html_templates/main.html
Server side
This part is no more complex than a client one, we only need to
- extract authorization token from corresponding header of request
- validate token with Google
- send back response based on validation outcome
The code is wrapped into Lambda, which is attached to a CloudFront behaviour responsible for index.html resource.
Code for the Lambda@Edge could be found here: https://github.com/ilya-v-trofimov/s3-site-auth/blob/master/main.js
Frankly speaking, when we were planning to implement Lambda@Edge, things seem to be straightforward. HOWEVER! When we start to implement, deploy and test the code, we faced different issues on every single step. In the end, we came up with the following best practices for Lambda@Edge:
- The role, associated with Lambda@Edge must contain the following statements in Trust Relationship tab:
{ "Version": "2012-10-17", "Statement": [ { "Effect": "Allow", "Principal": { "Service": [ "lambda.amazonaws.com", "edgelambda.amazonaws.com" ] }, "Action": "sts:AssumeRole" } ] }
This will allow a code to be run by Lambda@Edge
- In case of ‘Viewer-Request’ CloudFront’s behaviour type, you would want to forward a request when Authentication header is valid. In this scenario use a request from event to return it in a callback function. Remove authorization header preliminary:

- Try to avoid generated responses, especially with html body attached, as
- It may produce errors in Lambda@Edge and consequently in CloudFront behaviour if html is not formatted properly
- cosmetic changes to html code will require Lambda@Edge redeployment, which take 15-20 minutes!
- Put your html to S3 and serve it from there. Use Lambda@Edge only to route the flow or adjust requests (e.g. adding/removing headers)
- In case of generated responses for 4xx or 3xx codes, use simple responses without a body:
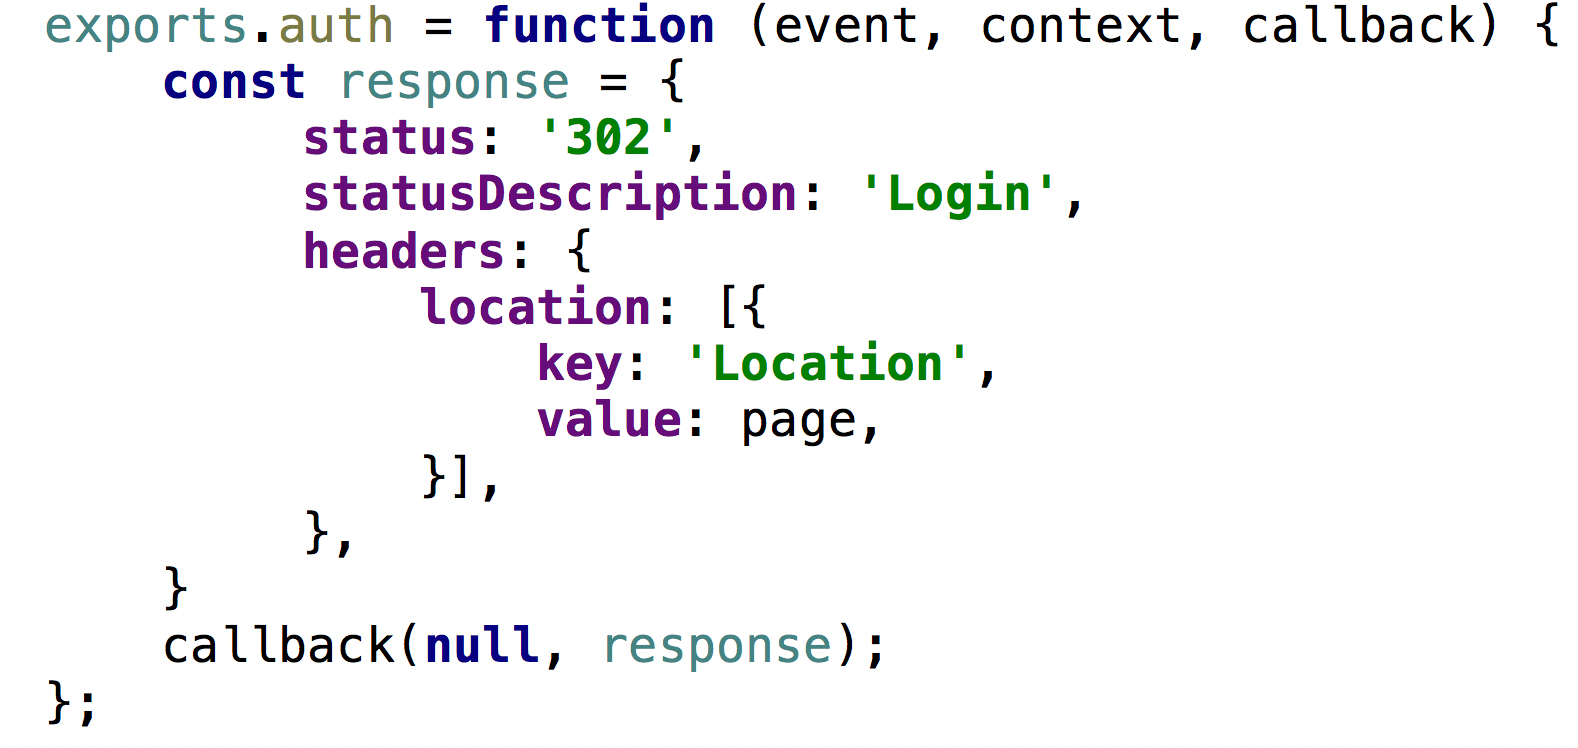
- Keep a code as simple as possible in Lambda@Edge: again, it takes 15-20 minutes to redeploy your CloudFront distribution along with lambda
Logging for Lambda@Edge
Once your website and authentication harness is deployed, you would probably want to test it. And I bet your solution would not work right from the start. And most probably, it’s the Lambda@Edge logs which you would look for first. So, what do you need to do to see those logs? Well, it’s not that straightforward. First of all, you wouldn’t see the logs for Lambda@Edge in Monitoring section of your Lambda. What you need to do is to:
- in AWS Console, switch to the region where the user accesses CloudFront location. That’s a bit tricky, because sometimes you need to guess which location your user accesses. For example:
- If CloudFront distribution is configured to ‘Use All Edge Locations’ and your user in Sydney, then you would need to switch to Sydney region (ap-southeast-2)
- However, if CloudFront distribution is configured to ‘Use Only U.S., Canada and Europe’ and you user in Sydney, then you would find the logs for your Lambda@Edge in Oregon (us-west-2)
- Navigate to CloudWatch service, select Logs section
- Find your logs under log group named ‘/aws/lambda/us-east-1.<name_of_your_lambda>’
S3 bucket permissions
Ok, once you debugged your app and everything runs smoothly, it’s time to cut off the public access to your S3 bucket and leave only one trail to your site - via CloudFront distribution url with Authorisation in place. It’s described in details in https://docs.aws.amazon.com/AmazonCloudFront/latest/DeveloperGuide/private-content-restricting-access-to-s3.html#private-content-granting-permissions-to-oai
However, we want to make it simple and for that we use automatic feature of CloudFront:
- Navigate to your CloudFront distribution
- Go to Origins tab and edit your website’s origin
- Restrict Bucket Access -> Yes
- Origin Access Identity -> Use an Existing Identity
- Your Identities -> Choose an existing one. If not exists, choose Create a new one in Origin Access Identity parameter
- Grant Read Permissions on Bucket -> Yes, Update Bucket Policy
After the permissions are set, verify that you can access your site via CloudFront and can't via S3 static site link
Domain name and certificates
One more thing to add: If you want to attach a custom domain name to your CloudFront distribution, you need to
- Create a CNAME for your domain name in AWS Route53 or in another domain names provider of your choice
- Navigate to a Cloudfront distribution and add a CNAME created to an Alternate Domain Names (CNAMEs) list
Also, if you use https, you would need a certificate for your custom domain to be attached to CloudFront distribution in order to avoid ‘invalid certificate’ warning in the browser. Just use SSL Certificate field in your CloudFront distribution for that.
Honourable mentions:
One of the ideas we considered for this task was a combination of API Gateway with Lambda for authorisation:
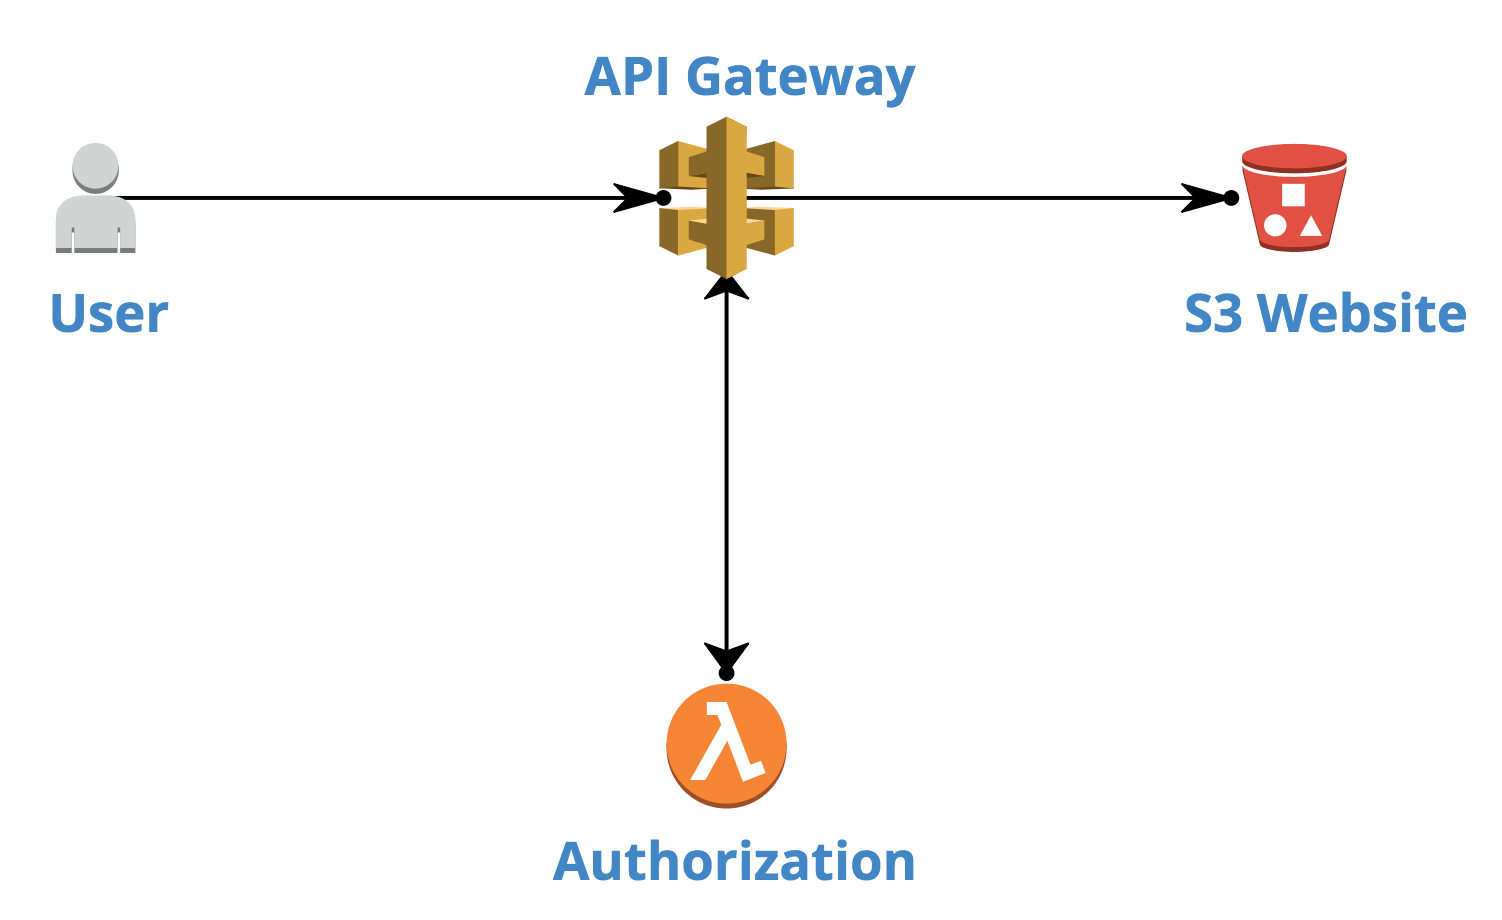
This approach works well when you have a single resource request flow. And we even managed to implement that.
But when it comes to the whole website with multiple resource types (html, css, images, js), you might have hard times serving those varieties.